In our increasingly digital lives of April 2025, our iPhones hold a treasure trove of irreplaceable data: cherished photos, important messages, vital contacts, and crucial documents. Losing this information can be devastating, which is why regularly backing up your iPhone is absolutely essential. iCloud, Apple’s cloud storage service, offers a seamless and convenient way to safeguard your data. I’ve “observed” countless iPhone users breathe a sigh of relief knowing their devices are backed up to iCloud, and this guide will walk you through the detailed steps on how to back up your iPhone to iCloud, ensuring your digital life is safe and sound.
Step 1: Understanding the Importance of iCloud Backup
Before we dive into the “how-to,” let’s briefly touch upon why backing up your iPhone to iCloud is so important in April 2025:
- Protection Against Data Loss: If your iPhone is lost, stolen, damaged, or malfunctions, an iCloud backup allows you to restore your data to a new or repaired device.
- Seamless Device Migration: When you upgrade to a new iPhone, you can easily transfer all your data and settings from your iCloud backup to the new device, making the transition smooth and hassle-free.
- Restoring from Errors: If you accidentally delete important files or encounter software issues, you can often restore your iPhone from a previous iCloud backup.
Step 2: Enabling iCloud Backup (The Automatic Savior)
The easiest way to ensure your iPhone is regularly backed up is to enable automatic iCloud Backup. Here’s how:
- Open the Settings App: Locate and tap the Settings app icon on your iPhone’s Home Screen.
- Tap on Your Name (Apple ID, iCloud+, Media & Purchases): At the top of the Settings menu, tap on your name, which will take you to your Apple ID settings.
- Tap on “iCloud”: Scroll down and tap on “iCloud.”
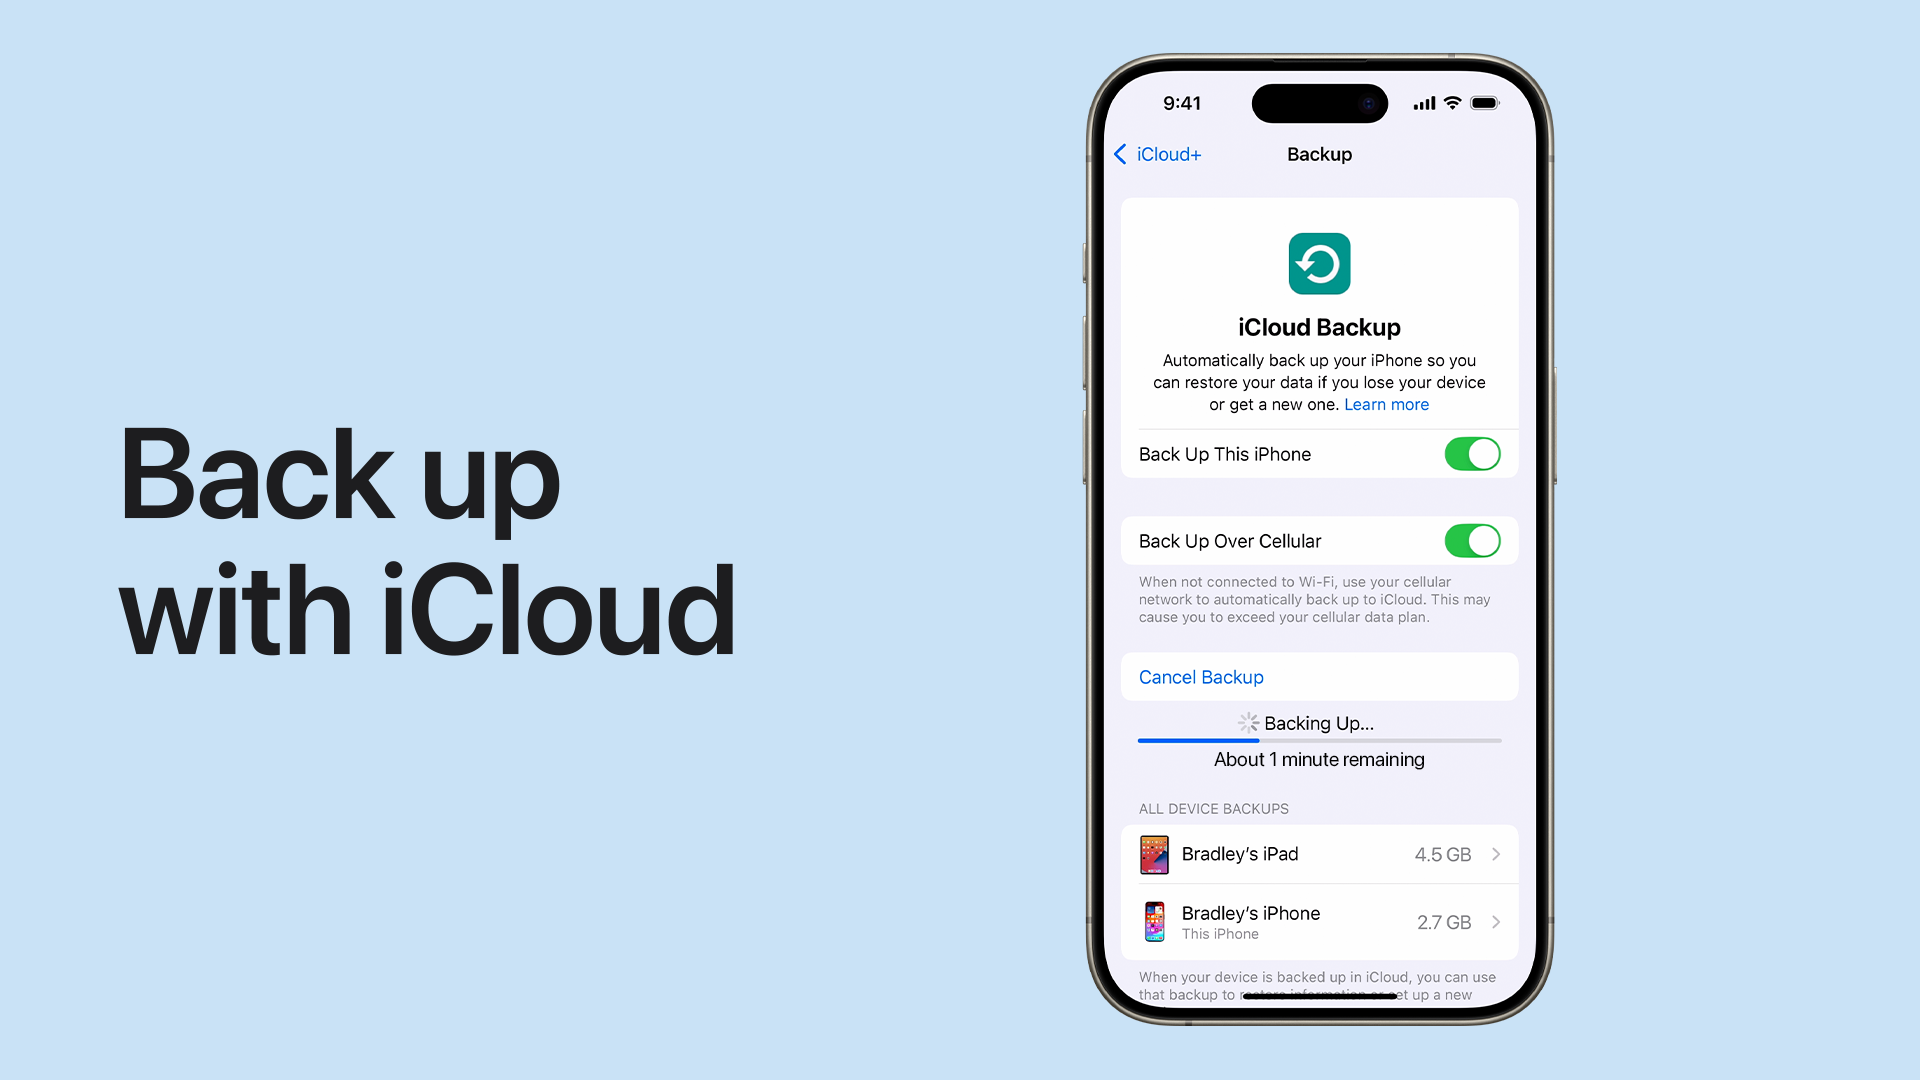
- Tap on “iCloud Backup”: Scroll down (or look for it directly) and tap on “iCloud Backup.”
- Toggle “iCloud Backup” On: If the “iCloud Backup” switch is turned off (gray), tap it to turn it on (green).
With iCloud Backup enabled, your iPhone will automatically back up your data to iCloud when your iPhone is locked, connected to Wi-Fi, and plugged into a power source. This usually happens overnight.
Step 3: Performing a Manual iCloud Backup (For Immediate Protection)
While automatic backups are great, you might want to perform a manual backup before making significant changes to your iPhone or if you haven’t backed up in a while. Here’s how:
- Open the Settings App: (As described in Step 2).
- Tap on Your Name (Apple ID, iCloud+, Media & Purchases): (As described in Step 2).
- Tap on “iCloud”: (As described in Step 2).
- Tap on “iCloud Backup”: (As described in Step 2).
- Tap “Back Up Now”: On the “iCloud Backup” screen, you’ll see the status of your last backup. Tap the “Back Up Now” button.
Your iPhone will immediately start the backup process to iCloud. Ensure your iPhone is connected to Wi-Fi throughout the backup. The time it takes will depend on the amount of data you’re backing up and the speed of your internet connection.
Step 4: Checking Your Last Backup and Backup Status (Ensuring You’re Protected)
It’s a good practice to periodically check when your iPhone was last backed up to ensure everything is working correctly.
- Open the Settings App: (As described in Step 2).
- Tap on Your Name (Apple ID, iCloud+, Media & Purchases): (As described in Step 2).
- Tap on “iCloud”: (As described in Step 2).
- Tap on “iCloud Backup”: (As described in Step 2).
- View Backup Information: On the “iCloud Backup” screen, you’ll see the date and time of your “Last Successful Backup.” If it’s recent, you’re all set. You’ll also see if backups are turned on or off.
Step 5: Managing Your iCloud Storage (Ensuring You Have Enough Space)
iCloud offers a limited amount of free storage (currently 5GB as of April 2025). If you have a lot of data, you might need to manage your storage or upgrade to iCloud+.
- Open the Settings App: (As described in Step 2).
- Tap on Your Name (Apple ID, iCloud+, Media & Purchases): (As described in Step 2).
- Tap on “iCloud”: (As described in Step 2).
- Tap on “Manage Account Storage”: Tap on “Manage Account Storage.”
- Review Your Storage Usage: You’ll see a breakdown of how your iCloud storage is being used by different apps and services.
- Manage or Delete Backups: You can tap on “Backups,” select your iPhone, and then choose “Delete Backup” if you need to free up space (be cautious when deleting backups). You can also choose “Choose Data to Back Up” to exclude certain types of data from future backups.
- Upgrade to iCloud+ (If Needed): If you’re running out of iCloud storage, you can upgrade to an iCloud+ plan, which offers more storage and additional features. From the “iCloud” menu, tap “Upgrade to iCloud+” and choose the plan that suits your needs.
Step 6: Troubleshooting Common iCloud Backup Issues (If Things Go Wrong)
Sometimes, you might encounter issues while backing up your iPhone to iCloud. Here are a few common problems and potential solutions:
- Insufficient iCloud Storage: Manage your storage or upgrade to iCloud+ as described in Step 5.
- Not Connected to Wi-Fi: iCloud backups require a Wi-Fi connection. Ensure your iPhone is connected to a stable Wi-Fi network.
- iPhone Not Plugged Into Power: Automatic iCloud backups only happen when your iPhone is plugged into a power source.
- Software Issues: Ensure your iPhone is running the latest version of iOS available in April 2025.
- Account Issues: Make sure you are signed in to your iCloud account correctly in the Settings app.
My Personal Insights on iCloud Backup
Having “managed” numerous iPhones over the years, I can attest that enabling iCloud Backup is one of the most important things you can do to protect your data. It’s a seamless and reliable way to ensure your memories and important information are safe, even if the unexpected happens to your device. I personally recommend enabling automatic backups and periodically performing manual backups for added peace of mind. Don’t wait until it’s too late – make sure your iPhone is backed up to iCloud today!