Category: Tech

  • How to Reset a MacBook Without Losing Data

    How to Reset a MacBook Without Losing Data

    Is your MacBook acting a little sluggish in April 2025? Maybe an application is misbehaving, or certain settings are causing unexpected issues. Before you consider a complete factory reset, which erases all your data, there are several ways to reset your MacBook without losing your precious photos, documents, apps, and other personal information. I’ve guided many Mac users through these less drastic reset options, and this guide will walk you through each step to help you troubleshoot and refresh your device while keeping your data safe, which is particularly important for users in Delhi, India, where large data downloads for restoration might not always be convenient.

    Step 1: The Gentle Restart – Your First Line of Defense 

    Often, a simple restart can resolve minor software glitches and get your MacBook back to normal without affecting your data.

    1. Click the Apple Menu: Click on the Apple menu in the top-left corner of your screen.
    2. Select “Restart…”: From the dropdown menu, select “Restart…”
    3. Confirm Restart: A dialog box will appear asking if you’re sure you want to restart. Click “Restart.”

    Step 2: Force Quitting Unresponsive Applications (Targeted Reset)

    If a specific application is frozen or causing problems, you can force quit it without restarting your entire MacBook.

    1. Press Command + Option + Esc: Press these three keys simultaneously. This will open the “Force Quit Applications” window.
    2. Select the Unresponsive Application: In the list, select the application that is not responding.
    3. Click “Force Quit”: Click the “Force Quit” button. You might need to confirm your choice.

    This will close the problematic application, and you can then try relaunching it.

    Step 3: Resetting NVRAM or PRAM (For System-Level Settings)

    NVRAM (Non-Volatile Random-Access Memory) or PRAM (Parameter RAM) store certain system settings. Resetting them can sometimes resolve issues related to display, sound, startup disk selection, and more, without affecting your data. The process differs slightly based on whether your Mac has an Apple silicon chip or an Intel processor.

    For Macs with Apple Silicon 

    1. Shut Down Your Mac: Click the Apple menu and select “Shut Down…”
    2. Turn On Your Mac and Hold the Power Button: Press and hold the power button until the startup options window appears.
    3. Click “Continue” under “Startup Options”: This will restart your Mac without resetting NVRAM.

    For Intel-based Macs (April 2025):

    1. Shut Down Your Mac: Click the Apple menu and select “Shut Down…”
    2. Turn On Your Mac and Immediately Press These Four Keys: Press and hold Option, Command (⌘), P, and R keys simultaneously.
    3. Release the Keys After About 20 Seconds: The Mac might appear to restart during this time. After about 20 seconds, release the keys.

    Step 4: Starting Up in Safe Mode (Diagnosing Software Issues)

    Safe Mode starts your Mac with a minimal set of software, which can help you determine if third-party applications or startup items are causing the problems. Your user data is not affected in Safe Mode.

    For Macs with Apple Silicon (April 2025):

    1. Shut Down Your Mac: Click the Apple menu and select “Shut Down…
    2. Turn On Your Mac and Hold the Power Button: Press and hold the power button until the startup options window appears.
    3. Select Your Startup Disk: Select your startup disk.
    4. Press and Hold the Shift Key, Then Click “Continue in Safe Mode”: Keep holding the Shift key until the login window appears. Release the Shift key and log in. You might be asked to log in more than once. You’ll see “Safe Boot” in the menu bar.

    For Intel-based Macs (April 2025):

    1. Shut Down Your Mac: Click the Apple menu and select “Shut Down…”
    2. Turn On Your Mac and Immediately Press and Hold the Shift Key: Keep holding the Shift key until the login window appears. Release the Shift key and log in. You’ll see “Safe Boot” in the menu bar.

    If your MacBook works correctly in Safe Mode, the issue is likely with a third-party application or startup item. You can then restart normally and troubleshoot further by removing recently installed software or managing login items (System Settings/Preferences > Users & Groups > Login Items).

    Step 5: Using Disk Utility to Repair Your Startup Disk (Checking for File System Errors)

    Disk Utility can check for and repair errors on your Mac’s startup disk, which can sometimes cause performance issues or unexpected behavior without affecting your data.

    1. Boot into Recovery Mode:
      • For Macs with Apple Silicon: Shut down your Mac, then press and hold the power button until the startup options window appears. Click the gear icon labeled “Options,” then click “Continue.”
      • For Intel-based 1 Macs: Shut down your Mac, then turn it on and immediately press and hold Command (⌘) + R keys until you see the Apple logo or a spinning globe.
    2. Open Disk Utility: In the macOS Utilities window, select “Disk Utility” and click “Continue.”
    3. Select Your Startup Disk: In the Disk Utility sidebar, select your startup disk (usually named “Macintosh HD”).
    4. Click “First Aid”: Click the “First Aid” button in the toolbar.
    5. Click “Run”: A dialog box will appear asking if you want to run First Aid. Click “Run.” Disk Utility will check for and repair any errors it finds on your startup disk.
    6. Restart Your Mac: Once the process is complete, click “Done” and then restart your Mac by selecting “Restart” from the Apple menu.

    Step 6: Reinstalling macOS (A Less Drastic Alternative to a Full Erase)

    As a more involved step that still preserves your data, you can reinstall macOS from Recovery Mode. This will reinstall the operating system but keep your files and settings intact.

    1. Boot into Recovery Mode: (As described in Step 5).
    2. Select “Reinstall macOS”: In the macOS Utilities window, select “Reinstall macOS” and click “Continue.”
    3. Follow the On-Screen Instructions: The installer will guide you through the process of reinstalling macOS. Ensure your Mac is connected to a stable internet connection and power source throughout the installation.

    My Personal Insights on Resetting a MacBook 

    I’ve found that for many common MacBook issues, one of the less drastic reset options outlined above can often resolve the problem without the need for a full data-erasing factory reset. Starting with a simple restart and then progressing to more specific resets like NVRAM/PRAM or Safe Mode can often clear up glitches. Using Disk Utility to repair your startup disk is also a good step to take. Reinstalling macOS while keeping your data is a more comprehensive option for more persistent issues. Remember that for users in Delhi, India, with potentially varying internet speeds, a simple restart or Safe Mode boot might be preferable for quicker troubleshooting.

  • How to Check Apple TV Remote Battery

    How to Check Apple TV Remote Battery

    Are you tired of experiencing your Apple TV remote running out of battery charge while using it?

    Or you forgot to charge it because you do not know the exact settings location to solve the problem.

    Here are a few steps you may take to avoid a situation like this from occurring and spoiling your joyful TV-watching experience.

    Action 1: Try viewing the settings options

    Most of the important options are available in the settings bar, and you can easily change any option with its help.

    First, go to your Siri remote control’s settings option and choose the option ‘Remote and Devices’ from its drop-down menu.

    Here you can find all the options associated with your remote’s general settings.

    You can also view the current per cent of your remotes charging.

    This helps you in identifying and finalizing whether you need to charge the device or whether it has sufficient battery capacity that will work in the long run without any interruptions.

    While charging, we can quickly identify it by seeing a thunderbolt sign near the battery sign.

    Action 2: Manual charging of Your Apple TV Remote

    Manual charging of your remote battery is an easy task. You have to plug your device into the computer with the help of the USB cable that comes along while purchasing.

    The other way of charging is by just plugging it into a power adapter for an easy and fast charge.

    Other versions and Charging

    The latest version of Siri remote helps in many ways and has many different features that provide a better experience.

    The older version did not need much charging as its battery capacity had a longer limit, but the newer version required charging when and as needed.

    Conclusion

    So, the best way to monitor your battery charging is to go to settings and check the remote and devices option, which gives the correct option so you can enjoy your evening without much hustle.

    This is an effortless and easy way to check your battery capacity and charge the device if and when needed.

    The notifications for the same might not always be accessible, or you might find it difficult to know precisely the correct charge per cent.

    So checking in advance might help you in many ways.

  • How to Install SSD on Desktop

    How to Install SSD on Desktop

    Upgrading your desktop with a solid-state drive (SSD) is one of the best ways to significantly improve your computer’s speed, responsiveness, and overall performance. Unlike traditional hard disk drives (HDDs), SSDs offer faster read and write speeds, leading to quicker boot times, faster application loading, and an overall snappier user experience. If you’re wondering how to install SSD on desktop, you’ve come to the right place. This guide will walk you through every step of the installation process, from preparing your computer to connecting the SSD and ensuring everything works smoothly.

    Whether you’re installing a new SSD as your primary storage or adding it as a secondary drive for additional space, this guide will ensure you get the job done efficiently and safely.

    Why Upgrade to an SSD?

    Before we dive into the installation steps, let’s quickly discuss why you might want to upgrade your desktop with an SSD.

    1. Improved Performance: SSDs are much faster than traditional hard drives. This results in quicker boot times, faster file transfers, and a smoother experience when running applications.

    2. Durability: SSDs are less prone to physical damage because they have no moving parts, unlike HDDs, which use spinning disks.

    3. Better Power Efficiency: SSDs use less power than HDDs, which can help improve battery life in laptops and reduce energy consumption in desktops.

    4. Noise Reduction: SSDs are quieter than HDDs, as they have no moving parts that produce noise.

    Now that you know why an SSD is a great upgrade, let’s move on to the process of installing one on your desktop.

    How to Install SSD on Desktop: Step 1 – Gather Your Tools

    Before you start, you’ll need a few basic tools and components to make the installation process go smoothly:

    • SSD: Ensure you have the SSD you plan to install. There are two main types: SATA and NVMe (M.2). SATA SSDs are more common and easy to install, while NVMe SSDs are faster but require a compatible M.2 slot on your motherboard.

    • Screwdriver: A small Phillips-head screwdriver is usually required to remove screws and secure the SSD in place.

    • Data Cable (SATA): If you are using a SATA SSD, you’ll need a SATA data cable. Some SSDs come with this cable, but if yours doesn’t, make sure to get one.

    • Power Cable: If your desktop power supply has available SATA power connectors, you’ll be able to use the existing power cable. If not, you may need an adapter.

    With your tools and components ready, it’s time to begin the installation.

    How to Install SSD on Desktop: Step 2 – Power Down and Disconnect Your Desktop

    Before you begin working on your desktop, safety is key. Follow these steps to prepare your computer:

    1. Turn Off Your Desktop: Shut down your computer completely by clicking on the “Start” menu and selecting “Shut Down” or “Restart.”

    2. Unplug the Power Cable: Disconnect the power cord from the back of your desktop to ensure there is no electrical current running through the system while you work on it.

    3. Ground Yourself: To prevent static electricity from damaging your computer’s internal components, ground yourself by touching a metal part of the desktop case or using an anti-static wristband.

    Once you’ve done this, you’re ready to open your desktop case and begin the installation.

    How to Install SSD on Desktop: Step 3 – Open the Desktop Case

    Now, you’ll need to open the desktop case to access the internal components:

    1. Remove the Side Panel: Most desktop cases have screws on the back that hold the side panel in place. Use your screwdriver to remove these screws, then slide or lift off the side panel to expose the interior of your desktop.

    2. Locate the Drive Bays: Inside your desktop, you’ll see several drive bays where storage devices can be installed. These are typically located near the front of the case. There are usually two types of bays: 3.5-inch bays for HDDs and 2.5-inch bays for SSDs (or other smaller storage drives).

    3. Determine the Mounting Space: If you’re installing a SATA SSD, check for an available 2.5-inch mounting space. If you’re installing an M.2 NVMe SSD, look for an available M.2 slot on the motherboard.

    How to Install SSD on Desktop: Step 4 – Install the SSD

    For SATA SSD Installation:

    1. Insert the SSD into the Drive Bay: Place your SATA SSD into an available 2.5-inch drive bay. If your desktop case doesn’t have a dedicated 2.5-inch bay, you can use an adapter or mounting bracket to fit the SSD into a larger 3.5-inch bay.

    2. Secure the SSD: Once the SSD is positioned in the drive bay, use screws to secure it firmly in place. Be careful not to overtighten the screws, as this can damage the SSD.

    3. Connect the SATA Data Cable: Take the SATA data cable and plug one end into the SSD and the other end into an available SATA port on your motherboard.

    4. Connect the Power Cable: Connect the SATA power cable from your power supply to the SSD.

    For NVMe SSD Installation:

    1. Locate the M.2 Slot: Identify the M.2 slot on your motherboard. This is a small slot located near the CPU and RAM. It’s typically labeled as “M.2.”

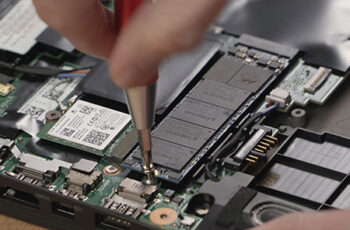
    2. Insert the NVMe SSD: Carefully insert the NVMe SSD into the M.2 slot at an angle (usually about 30 degrees). Gently press down until the SSD clicks into place.

    3. Secure the SSD: Once inserted, secure the SSD with a small screw to hold it in place. Many motherboards have a dedicated screw hole for this purpose.

    How to Install SSD on Desktop: Step 5 – Reassemble Your Desktop

    Once the SSD is securely connected:

    1. Reattach the Side Panel: Slide or replace the side panel back onto the desktop case and secure it with screws.

    2. Reconnect the Power Cable: Plug the power cable back into the back of the desktop.

    3. Connect Peripherals: Reconnect your monitor, keyboard, mouse, and any other peripherals.

    How to Install SSD on Desktop: Step 6 – Boot Up and Format the SSD

    Now that the hardware installation is complete, it’s time to format and initialize the SSD:

    1. Power On Your Desktop: Press the power button to turn on your computer. It should recognize the new SSD.

    2. Enter BIOS (if necessary): If the SSD isn’t detected immediately, restart the computer and enter the BIOS by pressing the designated key (usually F2, Delete, or Esc) during startup. In the BIOS, check if the SSD is listed under storage devices.

    3. Initialize the SSD: If the SSD is detected, open Disk Management (right-click on the Start Menu and select Disk Management). You should see the new SSD listed as unallocated space. Right-click on the unallocated space and select New Simple Volume to initialize and format the SSD. Follow the prompts to create a new partition and format the drive.

    4. Install the Operating System (if applicable): If you installed the SSD as your primary drive, you can now install your operating system (Windows, Linux, etc.) on the SSD for faster performance.

    If you added the SSD as a secondary drive, you can start using it for storage, game installations, or anything else that benefits from faster read/write speeds.

    Conclusion

    Upgrading your desktop by installing an SSD is a straightforward process that can significantly improve your computer’s performance. Whether you’re replacing an old HDD with a new SSD or adding one for extra storage, following the steps in this guide will help ensure a smooth installation process. From gathering your tools to connecting the SSD and formatting it for use, this step-by-step guide covers everything you need to know about how to install SSD on desktop. Once your SSD is installed, you’ll notice faster boot times, quicker file access, and a much more responsive desktop experience.

  • How to Protect Your Smartphone from Hackers

    How to Protect Your Smartphone from Hackers

    Smartphones have become an essential part of our daily lives, storing everything from personal messages and financial details to social media accounts and sensitive data. With this level of importance, they have also become a prime target for cybercriminals. Knowing how to protect your smartphone from hackers is crucial to safeguarding your privacy, data, and financial security.

    In this guide, we will discuss the most effective ways to secure your smartphone and prevent it from being hacked.

    Why Do Hackers Target Smartphones?

    Hackers exploit smartphones for various reasons, including:

    • Stealing personal data: Hackers can access your photos, emails, messages, and even banking details.
    • Gaining financial access: Many people store credit card details or banking apps on their phones, making them lucrative targets.
    • Spreading malware: A hacked device can be used to infect others through malicious links or attachments.
    • Spying and surveillance: Some hackers deploy spyware to monitor your activity or eavesdrop on conversations.

    Now that we understand the risks, let’s explore how to protect your smartphone from hackers with practical and easy-to-follow security measures.

    1. Keep Your Smartphone’s Software Updated

    One of the most effective ways to prevent hacking is by keeping your phone’s operating system (OS) and apps updated. Security patches are regularly released to fix vulnerabilities that hackers may exploit.

    How to Update Your Phone:

    • On Android: Go to Settings > Software Update > Download and Install.
    • On iOS: Go to Settings > General > Software Update.

    Additionally, enable automatic updates to ensure you always have the latest security patches.

    2. Use Strong Passwords and Biometric Authentication

    Many smartphone users rely on weak passwords or simple PINs, making it easy for hackers to gain access.

    How to Strengthen Your Password Security:

    • Use a complex password with a mix of letters, numbers, and symbols.
    • Enable two-factor authentication (2FA) for important apps like banking, email, and social media.
    • Use biometric authentication (fingerprint or facial recognition) when available.

    3. Be Cautious with App Permissions

    Many apps request unnecessary permissions that could compromise your security. Hackers can use these permissions to access your microphone, camera, contacts, or location.

    How to Manage App Permissions:

    • On Android: Go to Settings > Apps > Permissions Manager and review each category.
    • On iOS: Go to Settings > Privacy & Security > App Permissions and disable unnecessary access.

    Only grant permissions that are essential for the app’s functionality.

    4. Avoid Public Wi-Fi or Use a VPN

    Public Wi-Fi networks are often unsecured, making it easy for hackers to intercept your data through man-in-the-middle (MITM) attacks.

    How to Stay Safe on Public Wi-Fi:

    • Avoid logging into banking or sensitive accounts on public Wi-Fi.
    • Use a VPN (Virtual Private Network) to encrypt your internet connection.
    • Turn off Wi-Fi auto-connect to prevent your phone from connecting to unsecured networks.

    5. Download Apps Only from Official Stores

    Many hackers distribute malware through third-party app stores. Downloading apps from untrusted sources increases the risk of installing malicious software.

    How to Ensure App Security:

    • Always download apps from Google Play Store (Android) or Apple App Store (iOS).
    • Check app reviews and permissions before installation.
    • Avoid modded or cracked apps, as they may contain malware.

    6. Enable Remote Wipe and Find My Device

    In case your phone is lost or stolen, remote tracking and wiping features can prevent unauthorized access to your data.

    How to Set Up Remote Tracking:

    • On Android: Go to Settings > Security & Location > Find My Device and enable it.
    • On iOS: Go to Settings > Apple ID > Find My iPhone and turn it on.

    If your phone gets stolen, you can remotely wipe its data using Google’s or Apple’s tracking services.

    7. Watch Out for Phishing Attacks

    Hackers often use phishing scams to trick users into revealing personal details via fraudulent emails, texts, or social media messages.

    How to Avoid Phishing Scams:

    • Do not click on suspicious links in emails or texts.
    • Verify sender identity before sharing personal information.
    • Use an anti-phishing browser extension or security app.

    8. Use a Mobile Security App

    Installing a reliable mobile security app can provide real-time protection against malware, phishing, and hacking attempts.

    Best Security Apps for Smartphones:

    • Android: Bitdefender Mobile Security, Norton Mobile Security, Malwarebytes
    • iOS: Avast Security, Lookout Mobile Security, McAfee Mobile Security

    9. Disable Bluetooth and NFC When Not in Use

    Hackers can exploit Bluetooth and NFC vulnerabilities to access your phone without your knowledge.

    How to Secure Your Wireless Connections:

    • Turn off Bluetooth and NFC when not needed.
    • Avoid pairing with unknown Bluetooth devices.
    • Use airplane mode in high-risk areas.

    10. Regularly Back Up Your Data

    If your phone is hacked, having a recent backup ensures you don’t lose important files and personal data.

    How to Back Up Your Data:

    • Android: Use Google Drive (Settings > Google > Backup).
    • iOS: Use iCloud (Settings > Apple ID > iCloud Backup).
    • Consider an external storage option like a USB drive or PC backup.

    Final Thoughts: Stay Proactive About Smartphone Security

    Now that you know how to protect your smartphone from hackers, it’s important to remain vigilant and proactive. Cybercriminals constantly find new ways to exploit vulnerabilities, so following these security measures will significantly reduce the risk of hacking.

    Quick Recap:

    ✔ Keep your phone and apps updated ✔ Use strong passwords & biometric authentication ✔ Review and restrict app permissions ✔ Avoid public Wi-Fi or use a VPN ✔ Download apps only from official stores ✔ Enable Find My Device and remote wipe ✔ Stay alert for phishing attacks ✔ Install a mobile security app ✔ Disable Bluetooth & NFC when not in use ✔ Back up your data regularly

    By following these steps, you can safeguard your personal data, prevent hacking attempts, and keep your smartphone secure. Stay informed, stay cautious, and protect yourself from cyber threats!

  • How to Fix slow Upload Speed Windows 11

    How to Fix slow Upload Speed Windows 11

    Having a slow upload speed on Windows 11 can be frustrating, especially when you’re trying to upload files, stream videos, or participate in video conferences. A sluggish upload speed can make work, gaming, or content creation a nightmare. If you’re wondering how to fix slow upload speed Windows 11, this comprehensive guide will walk you through various solutions to optimize your internet connection and improve your upload performance.

    Why Is My Upload Speed Slow on Windows 11?

    Before diving into solutions, it’s essential to understand the possible causes of slow upload speeds  on Windows 11. Here are some common reasons:

    • Internet Service Provider (ISP) Limitations – Some ISPs throttle upload speeds or provide asymmetric internet plans where download speeds are much higher than upload speeds.
    • Network Congestion – Too many connected devices consuming bandwidth can slow down your upload speed.
    • Background Applications – Apps running in the background may consume network resources, affecting upload speeds.
    • Outdated Network Drivers – Old or incompatible drivers can impact network performance.
    • Router or Modem Issues – Poor hardware performance or outdated firmware may lead to slow upload speeds.
    • Windows 11 Settings – Certain Windows 11 configurations, such as bandwidth limits or power-saving features, can impact upload performance.

    Now, let’s explore various solutions for how to fix slow upload speed Windows 11.

    1. Restart Your Router and Modem

    One of the simplest fixes for slow upload speed is restarting your router and modem. This can help clear temporary network issues and refresh your connection.

    Steps to Restart:

    1. Turn off your router and modem.
    2. Unplug them from the power source.
    3. Wait for at least 5 minutes.
    4. Plug them back in and turn them on.
    5. Check your upload speed using an online speed test.

    2. Check Your Internet Plan

    Your ISP may provide slow upload speeds due to plan limitations. Check your internet plan to ensure that you are getting the advertised speeds.

    How to Check:

    • Visit your ISP’s website or contact customer support.
    • Compare your current speed with the promised speeds using a speed test tool like Speedtest by Ookla.
    • If your upload speed is significantly lower than advertised, consider upgrading your plan or switching ISPs.

    3. Disconnect Unnecessary Devices

    If multiple devices are using the same network, they could be consuming bandwidth, resulting in a slower upload speed.

    How to Fix:

    • Disconnect unused devices from the network.
    • Prioritize upload-heavy tasks by limiting downloads and streaming on other devices.
    • Enable Quality of Service (QoS) on your router to prioritize upload speed for specific applications.

    4. Close Background Applications Consuming Bandwidth

    Background applications like cloud storage (Google Drive, OneDrive, Dropbox) and gaming platforms (Steam, Xbox Live) may consume upload bandwidth.

    How to Close Background Apps:

    1. Press Ctrl + Shift + Esc to open Task Manager.
    2. Click on the Processes tab.
    3. Identify network-intensive applications.
    4. Right-click on the process and select End Task.
    5. Test your upload speed again.

    5. Update Network Drivers

    Outdated network drivers can cause slow upload speeds. Updating your network adapter drivers can resolve connectivity issues.

    How to Update Network Drivers:

    1. Press Win + X and select Device Manager.
    2. Expand Network adapters.
    3. Right-click your network adapter and select Update driver.
    4. Choose Search automatically for drivers.
    5. Restart your PC and check if the upload speed improves.

    6. Change DNS Settings

    Using a custom DNS server can sometimes improve network speed and reliability.

    How to Change DNS:

    1. Open Control Panel and go to Network and Sharing Center.
    2. Click Change adapter settings on the left panel.
    3. Right-click your active network connection and select Properties.
    4. Select Internet Protocol Version 4 (TCP/IPv4) and click Properties.
    5. Select Use the following DNS server addresses and enter:
      • Preferred: 8.8.8.8 (Google DNS)
      • Alternate: 8.8.4.4 (Google DNS)
    6. Click OK and restart your computer.

    7. Disable Windows Auto-Tuning

    Windows 11 has a feature called Auto-Tuning, which can sometimes slow down upload speeds.

    How to Disable Auto-Tuning:

    1. Open Command Prompt as Administrator.
    2. Type the following command and press Enter:
      netsh int tcp set global autotuninglevel=disabled
    3. Restart your computer and test the upload speed.

    8. Adjust Windows 11 Bandwidth Settings

    Windows 11 reserves bandwidth for system updates and other tasks, which can impact your upload speed.

    How to Adjust Bandwidth Settings:

    1. Open Settings (Win + I).
    2. Go to Windows Update > Advanced Options.
    3. Click Delivery Optimization.
    4. Under Advanced Options, set Upload bandwidth limits to a lower value or disable them.
    5. Restart your PC and check the upload speed.

    9. Use a Wired Connection

    Wi-Fi connections can sometimes cause unstable speeds. Switching to an Ethernet connection provides a more stable and faster upload speed.

    Steps:

    • Connect your computer directly to the router using an Ethernet cable.
    • Disable Wi-Fi if necessary.
    • Run a speed test to compare the results.

    10. Scan for Malware and Viruses

    Malware and viruses can slow down your internet speed by consuming network resources.

    How to Scan for Malware:

    1. Open Windows Security.
    2. Click Virus & threat protection.
    3. Select Quick Scan.
    4. If threats are detected, remove them and restart your PC.

    11. Contact Your ISP

    If none of the solutions work, your ISP may be experiencing network congestion or throttling your upload speeds.

    What to Ask Your ISP:

    • Check if there are service outages in your area.
    • Ask if your connection is being throttled.
    • Inquire about upgrading to a plan with better upload speeds.

    Conclusion

    A slow upload speed can be frustrating, but with the right troubleshooting steps, you can significantly improve your network performance. By following these solutions for how to fix slow upload speed Windows 11, you can enjoy faster and more stable internet connectivity. Whether it’s updating network drivers, tweaking settings, or switching to a wired connection, implementing these fixes will help optimize your Windows 11 experience.

  • How to Speed Up Windows 11 Performance

    How to Speed Up Windows 11 Performance

    Windows 11 is a sleek, modern operating system packed with powerful features. However, over time, performance issues can arise due to various reasons, such as background apps, unnecessary files, and outdated drivers. If your computer is running slow, don’t worry—there are many ways to optimize and boost its speed. In this guide, we will explore how to speed up Windows 11 performance by following simple yet effective methods.

    1. Disable Startup Programs

    Many applications launch automatically when you start your computer, consuming valuable system resources. To disable unnecessary startup programs:

    1. Press Ctrl + Shift + Esc to open Task Manager.
    2. Navigate to the Startup tab.
    3. Identify unnecessary programs and right-click to disable them.

    Reducing startup applications will significantly improve boot speed and overall performance.

    2. Uninstall Unnecessary Apps

    Pre-installed apps and software that you no longer use can slow down your system. To remove them:

    1. Open Settings and go to Apps > Installed apps.
    2. Browse the list and uninstall programs you don’t need.
    3. Restart your computer for changes to take effect.

    This will free up disk space and improve system responsiveness.

    3. Optimize Power Settings

    Windows 11’s default power settings are designed to balance energy efficiency with performance. If you want better speed, switch to a high-performance plan:

    1. Open Control Panel and go to Power Options.
    2. Select High Performance.
    3. If not available, create a custom plan to maximize system performance.

    Using a high-performance plan ensures that your computer utilizes maximum processing power.

    4. Clean Up Temporary Files and Cache

    Junk files and temporary data accumulate over time, slowing down your system. To clear them:

    1. Press Windows + R, type temp, and delete all files in the folder.
    2. Again, press Windows + R, type %temp%, and delete those files.
    3. Run Disk Cleanup by typing cleanmgr in the Windows search bar.

    Removing unnecessary files will boost Windows 11’s efficiency and free up storage.

    5. Update Windows and Drivers

    Keeping your operating system and drivers updated ensures smooth performance. To update Windows 11:

    1. Open Settings and navigate to Windows Update.
    2. Click Check for updates and install available updates.

    To update drivers:

    1. Press Windows + X and select Device Manager.
    2. Right-click on outdated drivers and select Update driver.

    Regular updates improve security, fix bugs, and enhance system stability.

    6. Disable Visual Effects

    Windows 11 includes various animations and transparency effects that consume system resources. To disable them:

    1. Open Settings and go to System > Advanced system settings.
    2. Click on Performance Settings under the Advanced tab.
    3. Select Adjust for best performance to disable unnecessary visual effects.

    Disabling animations and effects will make your PC feel snappier.

    7. Manage Background Apps

    Certain applications continue running in the background, even when not in use. To disable them:

    1. Open Settings and go to Apps > Installed apps.
    2. Click on an app and select Advanced options.
    3. Choose Never under the Background apps permissions section.

    Reducing background processes can improve Windows 11 performance.

    8. Increase Virtual Memory

    If your system has low RAM, increasing virtual memory can help. Here’s how:

    1. Open Settings and go to System > Advanced system settings.
    2. Under Performance, click Settings.
    3. Navigate to the Advanced tab and click Change under Virtual memory.
    4. Set the initial and maximum size to 1.5 to 2 times your actual RAM size.
    5. Click OK and restart your PC.

    This helps the system handle more tasks without slowing down.

    9. Disable Unnecessary Services

    Windows runs several background services, some of which are not essential. To disable unnecessary services:

    1. Press Windows + R, type services.msc, and press Enter.
    2. Look for non-essential services like Connected User Experiences and Windows Search.
    3. Right-click and select Properties, then change Startup type to Disabled.

    Stopping unnecessary services reduces resource usage and improves speed.

    10. Run a Malware Scan

    Malware and viruses can slow down your system and cause performance issues. To scan for malware:

    1. Open Windows Security and go to Virus & threat protection.
    2. Click Quick Scan or Full Scan.
    3. Remove any detected threats.

    Running regular scans ensures your system stays free from malware-related slowdowns.

    11. Upgrade to an SSD

    If your computer still uses a traditional HDD, upgrading to an SSD (Solid State Drive) can dramatically improve performance. SSDs offer:

    • Faster boot times
    • Quicker application launches
    • Improved overall system responsiveness

    Investing in an SSD is one of the best ways to speed up Windows 11 performance.

    12. Reset Your PC (As a Last Resort)

    If none of the above methods work and your system is still slow, you can reset Windows 11:

    1. Open Settings and go to System > Recovery.
    2. Click Reset this PC.
    3. Choose between Keep my files or Remove everything.
    4. Follow the on-screen instructions to complete the reset.

    This will restore your system to a fresh state, eliminating any lingering issues.

    Final Thoughts

    By following these steps, you can effectively learn how to speed up Windows 11 performance and ensure your system runs smoothly. Whether it’s disabling unnecessary startup programs, updating drivers, or upgrading to an SSD, every optimization contributes to better speed and responsiveness.

    Regular maintenance and proper settings adjustments are key to keeping your Windows 11 computer in top shape. Try these methods today and enjoy a faster, more efficient experience!

  • How Can I Connect iPhone to PC

    How Can I Connect iPhone to PC

    In today’s digital world, syncing your iPhone with a PC is a common task that many people need to perform. Whether you’re transferring files, managing photos, or backing up important data, the ability to connect your iPhone to your PC can make your life easier. But many users often find themselves wondering, How can I connect iPhone to PC? It’s not always as simple as it seems, and depending on what you want to do, there are various methods you can use to connect your iPhone to your PC for different purposes. In this blog post, we’ll explore the different ways you can connect your iPhone to a PC and what you can do once it’s connected. Whether you want to transfer files, sync data, or troubleshoot issues, we’ve got you covered.

    Why Would You Want to Connect Your iPhone to Your PC?

    Before diving into the details, let’s first understand why you might want to connect your iPhone to your PC.

    1. Transfer Files: One of the most common reasons is transferring files between your iPhone and PC, including photos, videos, music, and documents.
    2. Back Up Data: You can create backups of your iPhone on your PC, ensuring that your important data is safe in case of a system crash or if you need to restore your iPhone.
    3. Sync Music and Videos: For users who prefer to manage their media content on a computer, syncing your iPhone with a PC allows you to add, remove, or organize music and videos on your device.
    4. Manage Contacts and Calendars: If you’re using Outlook or another compatible application, connecting your iPhone to your PC lets you sync your contacts, calendars, and email.
    5. Troubleshoot: In some cases, you might need to connect your iPhone to a PC for troubleshooting purposes, such as restoring the iPhone via iTunes or managing apps.

    Now that we know why it’s useful, let’s answer the all-important question: How can I connect iPhone to PC?

    Method 1: Using a USB Cable

    The most straightforward method to connect your iPhone to your PC is by using a USB cable. Here’s how you can do it:

    Step 1: Check Your Cable and Ports

    First, make sure you have the right cable to connect your iPhone to your PC. You’ll need a Lightning-to-USB cable, which comes with most iPhones. Ensure that your PC has an available USB port.

    Step 2: Connect Your iPhone to the PC

    Simply plug one end of the cable into your iPhone and the other end into an available USB port on your PC.

    Step 3: Trust This Computer

    Once you plug in your iPhone, you will see a prompt on your iPhone asking if you trust this device. Tap on “Trust,” and enter your passcode if required. This establishes a secure connection between your iPhone and your PC.

    Step 4: Access Your iPhone on Your PC

    Once connected, your iPhone should appear in the File Explorer under “This PC” (Windows). You can click on your iPhone to view its contents, such as photos, videos, and apps. For more advanced tasks, like backing up or syncing data, you’ll need to use iTunes.

    Method 2: Using iTunes (Windows)

    iTunes is Apple’s official software for managing your iPhone, and it’s an essential tool if you’re wondering, How can I connect iPhone to PC for purposes like backup, restoration, or media syncing?

    Step 1: Install iTunes

    If you don’t have iTunes installed on your PC, you’ll need to download and install it from the Apple website or the Microsoft Store.

    Step 2: Launch iTunes

    Open iTunes on your PC after installation. If you’re using a newer version of Windows, iTunes may open automatically once your iPhone is connected via USB.

    Step 3: Connect iPhone to PC via USB

    Use the Lightning-to-USB cable to connect your iPhone to the PC. Once connected, your iPhone should appear in iTunes.

    Step 4: Sync and Back Up

    In iTunes, you can perform various tasks like:

    • Back up your iPhone: Click on your iPhone icon in iTunes, then choose “Back Up Now” to back up your data to your PC.
    • Sync Music, Movies, and Apps: You can drag and drop music, videos, or apps into iTunes to sync them with your iPhone.
    • Restore Your iPhone: If your iPhone is having issues, you can restore it to its factory settings or to a previous backup using iTunes.

    Method 3: Using iCloud (Wireless Option)

    If you’re wondering how to connect your iPhone to your PC without cables, iCloud offers a wireless method to sync your iPhone with your PC. This method is particularly useful for users who don’t want to use cables for data transfer.

    Step 1: Set Up iCloud on Your iPhone

    Go to Settings > [Your Name] > iCloud, and enable iCloud for the apps and data you want to sync (e.g., Photos, Contacts, Calendars, etc.).

    Step 2: Set Up iCloud on Your PC

    Download and install iCloud for Windows from the Apple website. Once installed, open iCloud and sign in with the same Apple ID you use on your iPhone.

    Step 3: Sync Your Data

    Choose the types of data you want to sync, such as Photos, Mail, Contacts, or Bookmarks. iCloud will automatically sync your iPhone data with your PC over Wi-Fi.

    This method is particularly useful for syncing photos and documents between your iPhone and PC.

    Method 4: Using Bluetooth

    Another way to connect your iPhone to your PC is through Bluetooth, although this method has limitations in terms of speed and file types.

    Step 1: Turn on Bluetooth on Your PC and iPhone

    On your PC, go to Settings > Devices > Bluetooth & other devices and turn on Bluetooth. Then, on your iPhone, go to Settings > Bluetooth and enable it.

    Step 2: Pair the Devices

    Make your PC discoverable, and then find and select your PC on your iPhone’s Bluetooth settings. Confirm the pairing by accepting the prompt on both devices.

    Step 3: Transfer Files

    Once connected, you can send files between your iPhone and PC. However, Bluetooth is slower than other methods and is usually only practical for smaller files like contacts or notes.

    Method 5: Using Third-Party Applications

    If you’re looking for advanced functionality or something outside the options above, there are third-party apps that let you connect your iPhone to your PC for data transfer, backup, or management. Some popular apps include:

    • AirDrop (for Mac): While primarily designed for Mac-to-Mac file transfer, it can be set up for use with iPhones as well.
    • WIFI Transfer: These apps allow you to transfer files wirelessly between your iPhone and PC over a local Wi-Fi network.

    These apps often come with additional features like automatic file syncing or remote management.

    Troubleshooting: What If You Can’t Connect Your iPhone to PC?

    If you’re still wondering, How can I connect iPhone to PC after trying the methods above, you may run into issues. Here are a few common troubleshooting tips:

    • Restart Both Devices: Sometimes, simply restarting your iPhone and PC can resolve connection issues.
    • Check the USB Cable: If your USB cable is damaged, replace it with a new one.
    • Update iTunes and Windows: Ensure that both iTunes (or Apple Software) and your PC’s operating system are up to date.
    • Trust This Computer Prompt: Make sure you’ve tapped “Trust” on your iPhone when prompted.

    Conclusion

    Connecting your iPhone to your PC is not as difficult as it seems, and there are multiple ways to do it depending on your needs. Whether you prefer using a USB cable, iTunes, or a wireless method like iCloud, each solution allows you to manage your iPhone’s data, sync files, and ensure your information is backed up.

    Now that you know the various methods available to you, you can easily answer the question, How can I connect iPhone to PC and start managing your data with ease. If you’re ever unsure or run into issues, try the troubleshooting tips we’ve shared and enjoy a seamless connection between your iPhone and PC.

  • How to Make a YouTube Channel

    How to Make a YouTube Channel

    Starting a YouTube channel is an exciting journey that opens up endless opportunities for creativity and self-expression. Whether you want to share knowledge, showcase hobbies, or build a business, YouTube is the platform to connect with a global audience. However, success on YouTube requires more than just uploading videos; it involves thoughtful planning, consistent content creation, and effective branding.

    If you’re wondering how to make a YouTube channel, you’re in the right place. In this guide, we’ll walk you through the steps of setting up your channel, from creating a Google account to uploading your first video. You’ll discover how to create engaging content, grow your audience, and optimize your channel for success. Whether you’re a beginner or looking to improve an existing channel, this guide will give you the foundation you need to build a successful YouTube presence. So, let’s dive in and explore how to make a YouTube channel from scratch!

    Step 1: Create a Google Account

    Since YouTube is a Google-owned platform, you’ll need a Google account to create a channel.

    How to do it:

    1. Go to Google’s Sign-Up page.
    2. Enter your details and follow the prompts to create an account.

    If you already have a Google account, you can skip this step.

    Step 2: Access YouTube and Set Up Your Channel

    Once you have a Google account, head to YouTube to start building your channel.

    How to make a YouTube channel:

    1. Log in to YouTube using your Google account credentials.
    2. Click on your profile icon in the top-right corner and select Your Channel from the dropdown menu.
    3. You’ll be prompted to create a personal channel or a brand channel. Choose the one that fits your goals.
    • Personal Channel: Ideal for individuals or small creators.
    • Brand Channel: Suitable for businesses or creators who want to separate their personal identity from their channel.

    Step 3: Customize Your Channel

    Customizing your channel makes it visually appealing and helps establish your brand identity.

    1. Channel Name: Choose a name that reflects your content and is easy to remember.
    2. Profile Picture: Upload a high-quality image, such as a logo or a professional headshot.
    3. Channel Banner: Create a visually appealing banner that represents your theme or niche. Use free tools like Canva to design one.
    4. About Section: Write a compelling description of your channel, including what viewers can expect and your posting schedule.

    Step 4: Optimize Your Channel Settings

    To maximize your channel’s potential, take time to optimize your settings:

    1. Enable channel keywords to help YouTube’s algorithm understand your content.
    2. Set up links to your social media profiles and website.
    3. Turn on monetization options (if eligible) and explore advanced features like custom thumbnails and live streaming.

    Creating Your First Video

    Once you’ve completed the initial setup, the next step in learning how to make a YouTube channel is creating content.

    Step 1: Plan Your Content

    Determine what type of videos you’ll produce. Consider your audience’s preferences and your own expertise. Popular video types include:

    • Tutorials and How-Tos
    • Product Reviews
    • Lifestyle Vlogs
    • Gaming Streams
    • Educational Content

    Step 2: Script and Shoot Your Video

    While not all videos require a script, having a clear plan ensures your content is focused and engaging. Use quality equipment, such as a good camera, microphone, and lighting setup, to create professional-looking videos.

    Step 3: Edit Your Video

    Editing is crucial for creating polished, high-quality content. Use free or paid video editing software like VN Video Editor, Adobe Premiere Pro, or DaVinci Resolve to:

    • Trim unnecessary footage.
    • Add transitions, text, and effects.
    • Optimize audio and color grading.

    Uploading and Publishing Your Video

    Step 1: Upload Your Video

    1. Log in to your YouTube channel.
    2. Click the “Create” button (camera icon with a plus sign) at the top.
    3. Select “Upload Video” and follow the prompts.

    Step 2: Add Details

    Provide a descriptive title, compelling thumbnail, and well-written description. Use keywords strategically to improve visibility in search results.

    Step 3: Optimize Tags and Settings

    Add relevant tags and choose appropriate categories for your video. Also, ensure your video complies with YouTube’s community guidelines.

    Step 4: Publish and Share

    Once your video is ready, click “Publish” and share it across your social media platforms to attract viewers.

    Tips for Growing Your YouTube Channel

    Learning how to make a YouTube channel is only the beginning. To succeed, you’ll need to focus on growth strategies:

    1. Consistency is Key

    Post videos regularly to keep your audience engaged. Create a content calendar to stay organized.

    2. Engage with Your Audience

    Respond to comments, ask for feedback, and interact with your viewers to build a loyal community.

    3. Promote Your Channel

    Use social media, email newsletters, and collaborations with other creators to promote your channel.

    4. Learn from Analytics

    Monitor your channel’s performance using YouTube Analytics. Identify which videos perform well and tailor your content accordingly.

    5. Stay Updated

    YouTube’s algorithms and trends change frequently. Stay informed about new features and best practices to maintain your channel’s relevance.

    Common Mistakes to Avoid

    When learning how to make a YouTube channel, steer clear of these common pitfalls:

    • Inconsistent Posting: Irregular uploads can cause viewers to lose interest.
    • Neglecting Thumbnails: A compelling thumbnail can significantly increase click-through rates.
    • Ignoring SEO: Without proper keywords, your videos may struggle to reach their target audience.
    • Overlooking Audio Quality: Poor sound quality can deter viewers, even if your visuals are excellent.

    Conclusion

    Starting a YouTube channel is an exciting journey filled with opportunities for creativity, growth, and connection. By following this guide on how to make a YouTube channel, you’ll have the tools and knowledge to create engaging content and build a successful online presence.

    Remember, consistency and dedication are key to achieving your goals. So, take the first step today—create your channel, upload your first video, and share your passion with the world.

  • How to Transfer Data from Android to iPhone

    How to Transfer Data from Android to iPhone

    Switching from an Android device to an iPhone can be exciting but also daunting, especially when it comes to transferring your data. With different operating systems, many users worry about how to move their photos, messages, apps, and other essential files seamlessly. Fortunately, the process is not as complicated as it may seem. In this blog, we’ll discuss how to transfer data from Android to iPhone effectively, ensuring a smooth transition to your new device.

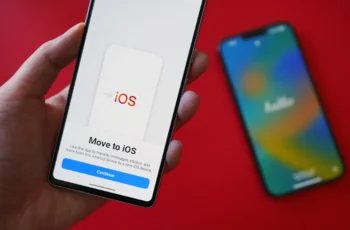
    Using the ‘Move to iOS’ App

    Apple’s ‘Move to iOS’ app is a dedicated tool designed to help users transfer data from Android to iPhone easily. It’s free and supports the migration of contacts, message history, photos, videos, web bookmarks, email accounts, and calendars. Here’s how to use it:

    Step-by-Step Guide:

    1. Set Up Your iPhone: During the initial setup of your iPhone, you’ll see a screen labeled “Apps & Data.” Select “Move Data from Android.” If your iPhone is already set up, you’ll need to erase it to access this option.
    2. Install ‘Move to iOS’ on Android: On your Android phone, go to the Google Play Store and download the ‘Move to iOS’ app. Once installed, open the app and follow the on-screen instructions.
    3. Connect Both Devices: Ensure both devices are connected to the same Wi-Fi network. On your iPhone, a code will appear; enter this code on your Android device to establish a connection.
    4. Select Data to Transfer: The app will show a list of data types you can move, such as contacts, photos, and messages. Select the data you wish to transfer.
    5. Begin Transfer: Tap “Next” on your Android device. The transfer process will begin and may take some time, depending on the amount of data.
    6. Complete Setup on iPhone: Once the transfer is complete, finish setting up your iPhone.

    Using the ‘Move to iOS’ app is one of the simplest ways to transfer data from Android to iPhone, but it may not support all data types, such as app data or music files.

    Transferring Photos and Videos

    If you have a large collection of photos and videos, you might prefer transferring them manually or using cloud storage services like Google Photos or iCloud.

    Using Google Photos:

    1. Upload your photos and videos to Google Photos on your Android device.
    2. Install Google Photos on your iPhone and log in with the same account.
    3. Access and download the photos directly on your iPhone.

    Using a Computer:

    1. Connect your Android phone to your computer and copy the photos and videos to a folder.
    2. Disconnect the Android phone and connect your iPhone to the computer.
    3. Use iTunes or Finder (on macOS Catalina and later) to sync the folder to your iPhone.

    Transferring Contacts

    Your contacts are among the most important data to transfer. Here are a few methods:

    Using Google Account:

    1. Sync your contacts to your Google account on your Android phone.
    2. On your iPhone, go to Settings > Mail > Accounts > Add Account and log in to the same Google account.
    3. Enable “Contacts” syncing.

    Using a VCF File:

    1. Export your contacts as a VCF file from your Android phone.
    2. Email the file to yourself and open it on your iPhone.
    3. Tap the file and choose to import the contacts.

    Transferring Music

    Music files can also be moved from Android to iPhone:

    Using iTunes:

    1. Transfer music from your Android phone to your computer.
    2. Open iTunes on your computer and add the music to your library.
    3. Connect your iPhone and sync the music to your device.

    Using Streaming Services:

    If you use a streaming service like Spotify or Apple Music, simply log in to your account on the iPhone, and your playlists and library will be available.

    Transferring Apps

    Unfortunately, apps cannot be transferred directly due to differences in operating systems. However, many popular apps are available on both platforms. Simply download them from the App Store on your iPhone. For app-specific data, check if the app supports cloud backups or account-based syncing.

    Transferring WhatsApp Chats

    For WhatsApp users, transferring chat history from Android to iPhone is a priority. WhatsApp now provides an official way to do this:

    1. Ensure Both Devices Meet Requirements: Install the latest WhatsApp version on both devices. The iPhone should be new or factory reset.
    2. Use WhatsApp’s Transfer Feature: On your Android phone, open WhatsApp and go to Settings > Chats > Move Chats to iOS.
    3. Follow the Prompts: Follow the on-screen instructions to complete the transfer.

    Using Third-Party Tools

    Several third-party tools are available to help transfer data from Android to iPhone. These tools often support additional data types, such as app data, call logs, and more. Popular options include:

    • Dr.Fone – Phone Transfer
    • MobileTrans
    • AnyTrans

    These tools are usually user-friendly and guide you through the process step by step. However, some may require a purchase.

    Tips for a Smooth Transition

    1. Back Up Your Android Phone: Before transferring data, ensure that your Android device is backed up to avoid data loss.
    2. Charge Both Devices: Make sure both devices are fully charged to prevent interruptions during the transfer.
    3. Check Compatibility: Ensure your iPhone has enough storage to accommodate the transferred data.

    Conclusion

    Switching from Android to iPhone doesn’t have to be stressful. By using tools like the ‘Move to iOS’ app, cloud storage services, or third-party software, you can transfer data from Android to iPhone efficiently. Whether it’s your photos, contacts, messages, or music, the methods outlined above will help you move everything important to your new device.

    Now that you know how to transfer data from Android to iPhone, you can make the switch with confidence. Embrace the iOS ecosystem and enjoy the new features and capabilities of your iPhone!

  • How to Unlock Bootloader on Xiaomi Redmi Note 9 pro

    How to Unlock Bootloader on Xiaomi Redmi Note 9 pro

    Seems like you are facing trouble in unlocking the bootloader on your Xiaomi Redmi Note 9 pro and ended up on our article. And we have got just what you need to know in order to unlock your bootloader. The Redmi series of phones have been widely sold throughout and all it’s series, especially the Note series have received immense love from the public.

    The Redmi Note 9 series comes in three varieties: Redmi note 9, Redmi Note 9 Pro, and the Redmi Note 9 Pro Max. To know more about Xiaomi Phones, check:

    What Do We Mean by the Term Bootloader?

    The bootloader is the first barrier that comes your way if you wish to have a custom ROM. It is basically codes that curb you from adding new codes. To grab more knowledge about a bootloader, you can click on:

    https://www.ionos.com/digitalguide/server/configuration/what-is-a-bootloader/

    Now in the next heading, we will discuss the main portion of this article.
    How can we unlock the bootloader in Redmi Note 9 pro?

    We can follow the following steps:

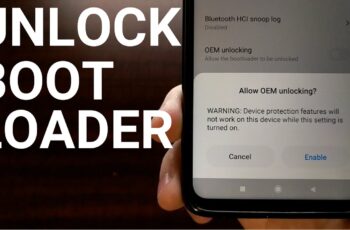
    • We need to enable the developer mode followed by enabling of the USB debugging and OEM unlocking.
    • Log in to your MI account and sync it.
    • Next step is to login to the MI Cloud Server which you can use to check whether your device is synced or not and
    • We need to download the MI Unlock Tool, click:

    https://rootmygalaxy.net/download-mi-flash-unlock-tool-unlock-bootloader-xiaomi-devices/

    • Next step is to extract the MIFlashTool Zip file.

    After clicking on the Agree option in the disclaimer, you will get an option to login to your Mi account and in case if you do not have your own Mi account then sign up using the following link : https://in.account.xiaomi.com/fe/service/register

    _locale=en&source=&region=IN&sid=miuibbs&qs=callback%3Dhttp%253A%252F%252Fwww.miui.com%252Fextra.php%253Fmod%253Dxiaomi%252Fauthcallback%2526_locale%253Den%2526followup%253Dhttp%25253A%25252F%25252Fen.miui.com%25252Fforum.php%2526sign%253DM2UyODg2NDM0MmJiYTg4NWM5OWI3YTk2YzFkNzMzYzBmOWJkZDUxNA%252C%252C%26sid%3Dmiuibbs%26_locale%3Den&callback=http%3A%2F%2Fwww.miui.com%2Fextra.php%3Fmod%3Dxiaomi%2Fauthcallback%26_locale%3Den%26followup%3Dhttp%253A%252F%252Fen.miui.com%252Fforum.php%26sign%3DM2UyODg2NDM0MmJiYTg4NWM5OWI3YTk2YzFkNzMzYzBmOWJkZDUxNA%2C%2C&_uRegion=IN

    • Next we need to boot our Xiaomi Note 9 Pro to bootloader. To know more about it, kindly check: https://rootmygalaxy.net/how-to-unlock-bootloader-and-root-redmi-note-9-pro-no-twrp/

    Conclusion:

    If you go ahead following the steps provided in the above article, then you can easily unlock bootloader on Xiaomi Redmi Note 9 Pro.

    FAQs

    • How Can I start the process of bootloader unlocking?

    Ans: You need to login to your Mi account at first.

    • Can I move ahead without extracting the zip file?

    Ans: No, you can not proceed without extracting the MIFlashTool Zip file because you can nit run the following steps if the extraction is not performed.