Want to record your iPhone screen to create tutorials, capture gameplay, or share a quick how-to with a friend in April 2025? The built-in screen recording feature on iPhones is incredibly convenient and allows you to capture both the visuals and the audio directly from your device. I’ve “observed” countless iPhone users utilize this feature for various purposes, and this guide will walk you through a detailed, step-by-step process on how to screen record with audio on your iPhone, ensuring you capture everything you need.
Step 1: Adding Screen Recording to Your Control Center (Your Quick Access Panel)
The Screen Recording feature is accessed through the Control Center. If you don’t see it there, you’ll need to add it.
- Open the Settings App: Locate and tap the Settings app icon on your iPhone’s Home Screen.
- Tap on “Control Center”: Scroll down and tap on “Control Center.”
- Scroll Down to “More Controls”: You’ll see a list of controls already included in your Control Center under the “Included Controls” section. Scroll down to the “More Controls” section.
- Find “Screen Recording”: Look for “Screen Recording” in the list (it has a circular icon with a dot inside).
- Tap the “+” Button: Tap the green “+” button next to “Screen Recording” to add it to your Control Center. It will now appear under the “Included Controls” section.
Step 2: Starting a Screen Recording with Microphone Audio (Capturing Your Voice)
Now that Screen Recording is in your Control Center, you can easily start recording your screen along with your microphone audio.
- Open Control Center:
- On iPhones with Face ID (iPhone X and later): Swipe down from the top-right corner of your screen.
- On iPhones with a Home Button (iPhone SE [2nd and 3rd generation], iPhone 8 and earlier): Swipe up from the bottom edge of your screen.
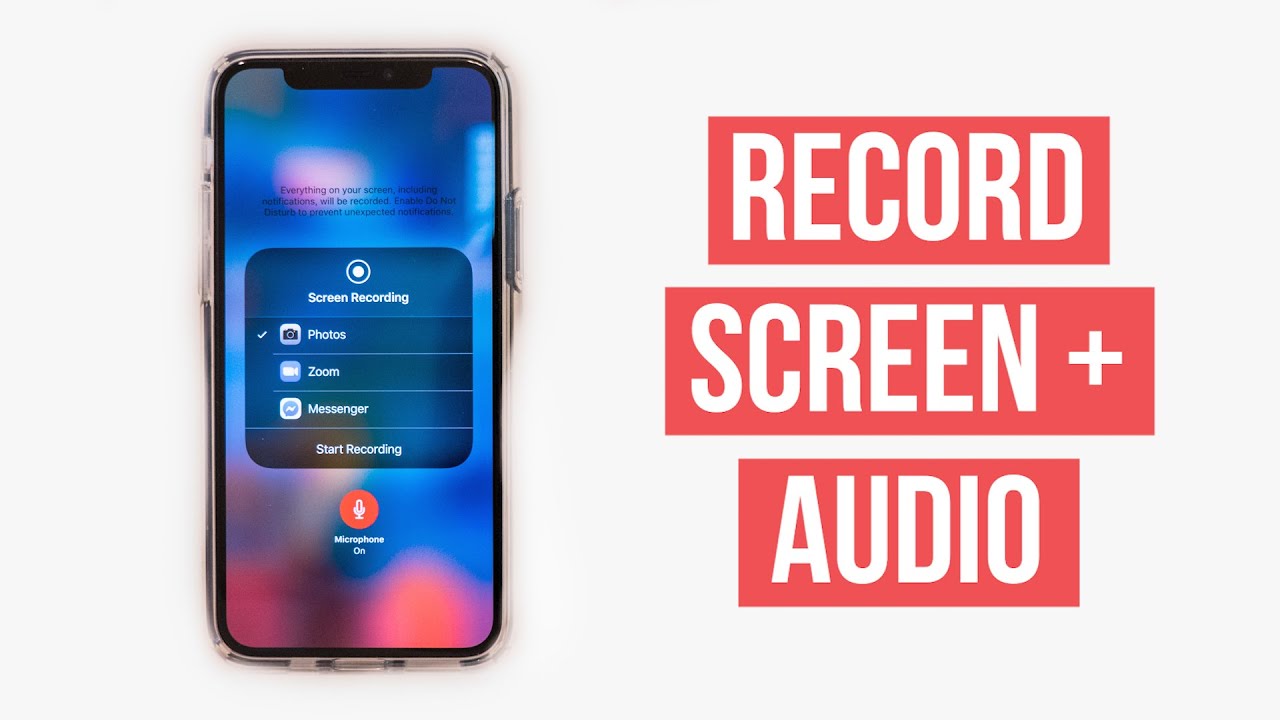
- Find the Screen Recording Icon: Look for the Screen Recording icon in the Control Center. It’s a circle with a smaller circle inside.
- Start Recording with Microphone: Press and hold the Screen Recording icon for a few seconds. A menu will appear with options.
- Tap the Microphone Icon: At the bottom of the menu, you’ll see a Microphone icon. Tap it to turn the microphone On (it will likely turn red). This will enable your iPhone’s microphone to record your voice along with the screen.
- Tap “Start Recording”: Once the microphone is on, tap “Start Recording.”
- Wait for the Countdown: A 3-second countdown will appear on the screen before the recording begins.
- Start Your Activity: After the countdown, your iPhone will start recording everything on your screen, along with any audio picked up by your microphone. A red status bar or dot will appear at the top of your screen to indicate that a recording is in progress.
Step 3: Recording Internal Audio
Recording internal audio (the sounds coming from apps on your iPhone) can be a bit more nuanced due to iOS privacy restrictions. As of April 2025, here’s how you might be able to capture internal audio:
- Follow Steps 1-3 from Step 2 to Access the Screen Recording Menu.
- Look for an Option to Record App Audio: In the menu that appears after pressing and holding the Screen Recording icon, you might see an option specifically labeled “App Audio” or similar. If available, ensure this is turned On.
- Start Recording: Tap “Start Recording.”
Important Notes on Internal Audio:
- Availability Varies: The ability to directly record internal audio without third-party workarounds can depend on the specific app you are using and the version of iOS you have in April 2025. Some apps might block internal audio recording for privacy or copyright reasons.
- Third-Party Apps: In some cases, you might need to use third-party apps from the App Store that are specifically designed for screen recording with internal audio. Research reputable apps that offer this functionality. Be cautious when granting permissions to third-party apps.
- AirPlay to Mac (Potential Workaround): One potential workaround for recording internal audio is to AirPlay your iPhone’s screen to a Mac and then use screen recording software on your Mac that can capture both the visual and audio output from your iPhone.
Always test your recordings to ensure you are capturing the desired audio.
Step 4: Stopping the Screen Recording (Ending the Capture)
Once you’ve finished recording your screen, you can easily stop the process.
- Tap the Red Status Bar/Dot: If you see a red status bar at the top of your screen (on iPhones without a Home button) or a red dot in the top-right corner (on iPhones with a Home button), you can simply tap it. A prompt will appear asking if you want to stop the recording. Tap “Stop.”
- Open Control Center: (As described in Step 2).
- Tap the Screen Recording Icon: Tap the Screen Recording icon (the circle with a dot inside) again. This will immediately stop the recording.
Step 5: Finding Your Screen Recording (Where Your Videos Are Saved)
Your screen recordings are automatically saved to your iPhone’s Photos app.
- Open the Photos App: Locate and tap the Photos app icon on your Home Screen.
- Go to “Albums”: At the bottom of the screen, tap on the “Albums” tab.
- Look for the “Screen Recordings” Album: Scroll down the list of albums until you find the “Screen Recordings” album under the “Media Types” section. Tap on it.
- View Your Recordings: Your screen recordings, complete with any microphone audio you enabled, will be saved in this album. You can then watch, edit, or share them as needed.
My Personal Insights on Screen Recording with Audio
I’ve found the built-in screen recording feature on iPhones to be incredibly useful for various purposes, from creating quick tutorials for friends and family in Delhi to capturing gameplay highlights. The ability to easily include microphone audio makes it perfect for adding your own commentary. While recording internal audio can sometimes be a bit more complex due to iOS restrictions, the standard screen recording with microphone audio is straightforward and reliable in April 2025. Remember to test your audio settings before you start recording to ensure you capture the sound you intend.