ChatGPT has emerged as a powerful tool for programmers, offering assistance in writing, debugging, and understanding code. Whether you’re a beginner or an experienced developer, leveraging ChatGPT can enhance your coding workflow. This guide provides a comprehensive walkthrough on how to effectively use ChatGPT for coding tasks.
- Define Your Coding Objective
Before interacting with ChatGPT, clearly outline what you aim to achieve. Whether it’s writing a new function, debugging existing code, or understanding a concept, having a specific goal will help in formulating effective prompts.
- Craft Clear and Detailed Prompts
The quality of ChatGPT’s assistance heavily depends on the clarity of your prompts. Here are some tips:
- Be Specific: Instead of saying, “Help me with Python,” specify, “Write a Python function to sort a list using bubble sort.
- Provide Context: If you’re seeking help with existing code, share relevant portions and explain the issue.
- Set Constraints: Mention any limitations or requirements, such as time complexity or library usage.
- Utilize ChatGPT for Code Generation
ChatGPT can generate code snippets based on your descriptions. For example:
Prompt: “Write a Python function that returns the Fibonacci sequence up to n terms.”
ChatGPT will provide a function that you can test and integrate into your project.
- Debugging with ChatGPT
Encountering errors is common in programming. ChatGPT can assist in identifying and resolving issues.
Prompt: “Here’s my JavaScript code for a calculator. It doesn’t return the correct sum. Can you help identify the problem?”
By analyzing the provided code, ChatGPT can suggest corrections and explain the reasoning.
- Learn and Understand Programming Concepts
Beyond code generation, ChatGPT is a valuable resource for learning. You can ask it to explain concepts, such as:
Prompt: “Explain the difference between synchronous and asynchronous programming in JavaScript.”
ChatGPT will provide a detailed explanation, aiding in your understanding.
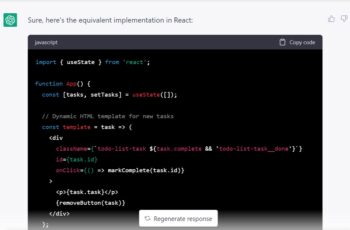
- Translate Code Between Languages
If you’re looking to convert code from one programming language to another, ChatGPT can help.
Prompt: “Convert this Python function to JavaScript.”
Provide the Python code, and ChatGPT will generate the equivalent JavaScript version.
- Optimize and Refactor Code
Improving code efficiency and readability is crucial. ChatGPT can suggest optimizations.
Prompt: “Refactor this C++ code to improve performance and readability.”
By analyzing your code, ChatGPT can recommend changes that enhance its quality.
- Generate Test Cases
Testing is vital to ensure code reliability. ChatGPT can assist in creating test cases.
Prompt: “Provide unit tests in Python for a function that checks if a number is prime.”
ChatGPT will generate test cases that you can use to validate your function.
- Document Your Code
Proper documentation makes code maintenance easier. ChatGPT can help generate docstrings and comments.
Prompt: “Add docstrings to this Python function that calculates factorial.”
ChatGPT will provide appropriate documentation for your function.
- Limitations and Best Practices
While ChatGPT is a powerful tool, it’s essential to be aware of its limitations:
- Verification: Always test and review the code generated by ChatGPT.
- Security: Avoid sharing sensitive information in your prompts.
- Learning Tool: Use ChatGPT as a supplement to your learning, not a replacement.
Conclusion
ChatGPT serves as a versatile assistant in your coding journey, capable of generating code, debugging, explaining concepts, and more. By crafting clear prompts and understanding its capabilities, you can significantly enhance your programming efficiency and knowledge.