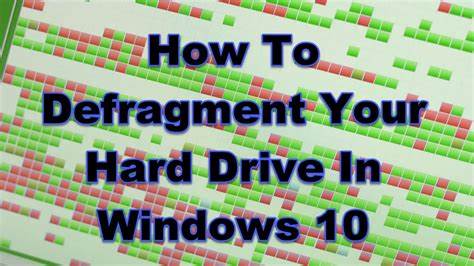
Over time, files on your Windows 10 hard drive can become fragmented. This means parts of the same file are scattered across different areas of the disk. This can slow down your system, especially if you’re using a traditional HDD (Hard Disk Drive). One effective way to improve performance and load times is by defragmenting the hard drive.
I’ve used this method regularly on my older laptop with a mechanical hard drive, and the difference in performance—especially during boot or when accessing large files—is noticeable. This guide explains how to defragment your hard drive safely and correctly using built-in Windows tools.
What Is Disk Defragmentation?
When Windows saves files on an HDD, it tries to keep the data in continuous blocks. Over time, as files are added, modified, or deleted, gaps form. New data gets split and stored in multiple places—this is fragmentation.
Defragmentation reorganizes the data so files are stored in adjacent blocks. This reduces the time it takes for the drive head to read them. This process is only necessary for HDDs. If you’re using an SSD (Solid State Drive), defragmentation is not recommended and unnecessary.
How to Check If You Need to Defragment
Before jumping into defragmentation, you can check the fragmentation level.
Steps:
- Press Windows + S and search for Defragment and Optimize Drives.
- Open the app titled Defragment and Optimize Drives.
- You’ll see a list of drives with their media type (Solid State Drive or Hard Disk Drive).
- Select your HDD and click Analyze.
If the fragmentation percentage is 10% or higher, it’s time to defragment.
Step-by-Step Guide to Defragment a Hard Drive in Windows 10
Step 1: Open the Optimize Drives Tool
You don’t need third-party software for this task. Windows has a built-in utility that works well.
Steps:
- Press Windows + S
- Type and select Defragment and Optimize Drives
- The tool will open and list all available drives
I prefer creating a shortcut for this tool on my desktop since I use it monthly.
Step 2: Select the Hard Drive
The tool displays all drives by name, letter, and type.
- Look for your Hard Disk Drive (not SSD) in the list
- Click once to highlight it
This helps you avoid defragmenting an SSD, which can reduce its lifespan.
Step 3: Analyze the Drive
Before optimizing, it’s good practice to analyze the drive.
- Click the Analyze button with the HDD selected
- Wait for Windows to scan the drive
- Check the % fragmented result
On my old laptop, I usually see 8–15% fragmentation after a few months of use, which affects file access speed noticeably.
Step 4: Click Optimize to Start Defragmentation
If the fragmentation is 10% or higher:
- Click the Optimize button
- Windows will start the defragmentation process
Depending on the size of the drive and the level of fragmentation, this can take from a few minutes to over an hour. You can continue working, but I usually let the process run uninterrupted.
Step 5: Monitor Progress
The status bar will show:
- Passes completed
- Percentage complete
Once it finishes, the status will change to “OK (0% fragmented)“ or similar.
Step 6: Schedule Automatic Optimization
Windows 10 allows you to automate defragmentation, which is very helpful.
To schedule:
- In the Optimize Drives window, click Change settings
- Make sure Run on a schedule (recommended) is checked
- Choose the frequency: Daily, Weekly, or Monthly
- Select the drives you want to include
- Click OK to confirm
I personally set it to weekly for my HDD and exclude the SSD from this schedule.
Tips for Effective Defragmentation
- Do not use your computer heavily during defragmentation. It’s best to do it when idle.
- Close large applications (like games or video editors) before starting.
- Always exclude SSDs from the process.
- If you have multiple HDDs, repeat the process for each.
Can You Use the Command Line for Defragmentation?
Yes, if you prefer using the Command Prompt, here’s how.
Steps:
- Open Command Prompt as Administrator (search for cmd, then right-click > Run as administrator)
- Type the following command and press Enter:
mathematica
CopyEdit
defrag C: /O
This command defragments drive C and performs optimization. You can replace C: with any drive letter.
Additional options:
- /A — Analyze the drive
- /U — Show progress
- /V — Verbose output with details
I’ve used this when remote troubleshooting systems or scripting scheduled maintenance tasks.
When Should You Defragment a Hard Drive?
- When boot times are slow
- When apps take longer to open
- If file transfers or loading seem delayed
- After uninstalling or deleting many files
- When the analyze tool shows 10% or more fragmentation
A monthly check is a good habit, especially if you’re using an HDD for storage-heavy tasks like video editing or gaming.
What About SSDs?
Do not defragment SSDs.
Windows 10 uses a different method called TRIM for SSDs, which improves performance and longevity. SSDs have no moving parts, so fragmentation doesn’t slow them down.
Windows detects SSDs automatically and handles them differently during scheduled maintenance.
Common Misconceptions
- Defragmentation deletes data — It doesn’t. It only reorganizes existing files.
- More frequent defrags mean better performance — Not necessarily. Over-defragmenting can reduce the lifespan of older HDDs.
- It improves SSDs — Not true. SSDs should never be defragmented.
Conclusion
Defragmenting your hard drive in Windows 10 is a simple yet powerful way to improve performance on computers that use mechanical HDDs. Using the built-in Optimize Drives tool, you can analyze, defragment, and schedule automatic maintenance—all without needing third-party software.
I recommend doing it once a month for casual users and once a week for heavy HDD users. Just remember: if your system uses an SSD, defragmentation should be avoided.


