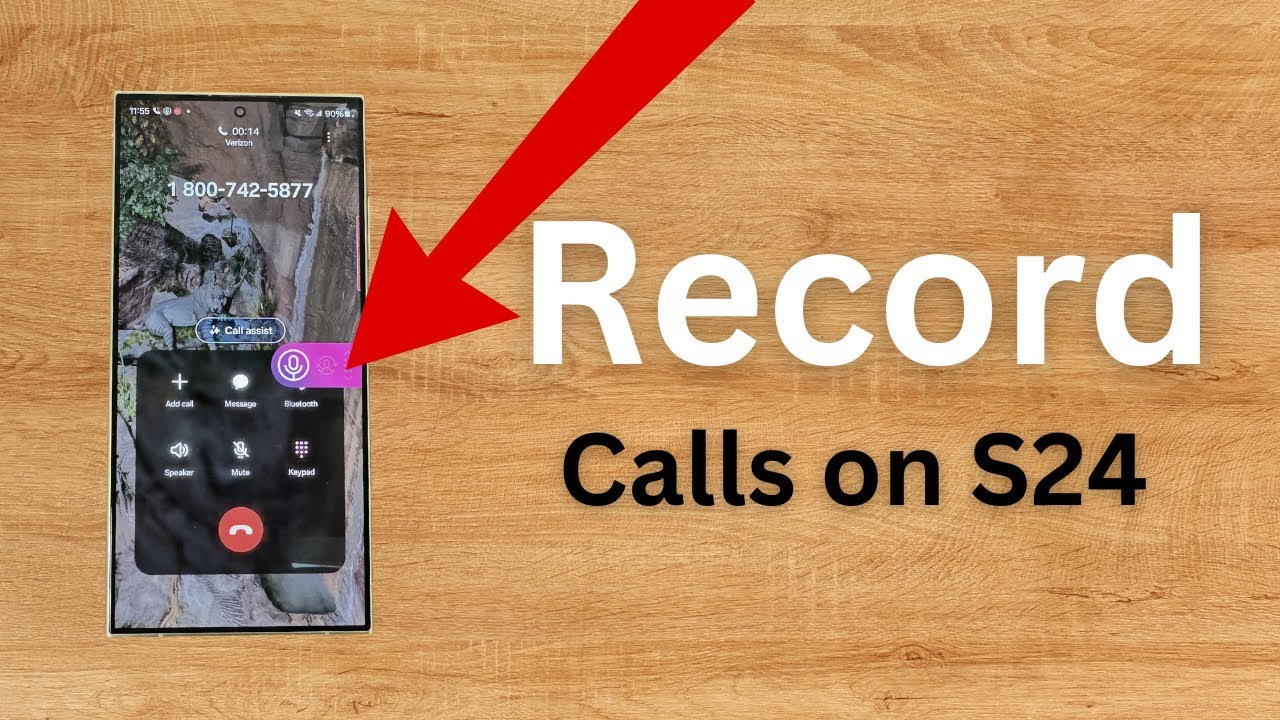
Blog

  • How to Fix Wifi Not Working in Windows 10/11

    How to Fix Wifi Not Working in Windows 10/11

    It sounds incredibly frustrating when your Wi-Fi stops working on Windows 10 or 11. It’s a common issue, and thankfully, most of the time, it’s something you can fix yourself with a few troubleshooting steps. Having personally wrestled with flaky Wi-Fi connections more times than I can count, I’ve found that a systematic approach usually yields results.

    This guide will walk you through various solutions, from the simplest fixes to more in-depth troubleshooting, helping you get back online.

    How to Fix Wi-Fi Not Working in Windows 10/11

    When your internet connection drops, it can halt everything. Here’s a comprehensive how-to guide to resolve Wi-Fi issues on your Windows 10 or 11 PC.

    1. The Basics: Restart Everything

    It might seem too simple, but often, a quick restart is all that’s needed.

    • Restart your PC: Save any open work and restart your Windows computer. This can clear temporary glitches that might be affecting your Wi-Fi adapter.
    • Restart your Router/Modem: Unplug your Wi-Fi router and modem from the power outlet. Wait for about 30 seconds, then plug them back in. Allow a few minutes for them to fully boot up and establish a connection before trying to connect your PC again. This refreshes the network connection.
    1. Check Your Wi-Fi Switch or Airplane Mode

    Accidentally toggling a physical switch or enabling Airplane Mode can disconnect your Wi-Fi.

    • Physical Wi-Fi Switch: Some laptops have a physical switch or a function key combination (often Fn + F2, F5, or a key with a Wi-Fi symbol) to turn Wi-Fi on or off. Make sure it’s in the “On” position.
    • Airplane Mode:
      1. Click on the Network icon (Wi-Fi or Ethernet) in the bottom-right corner of your taskbar.
      2. Check the Airplane mode tile. If it’s highlighted, click on it to turn it off. Ensure the Wi-Fi tile is highlighted (meaning it’s on).
    1. Run the Windows Network Troubleshooter

    Windows has built-in troubleshooters that can often diagnose and fix common network problems.

    1. Go to Settings (Windows key + I).
    2. For Windows 11: Click on System > Troubleshoot > Other troubleshooters. Find Network Adapter and click Run.
    3. For Windows 10: Click on Update & Security > Troubleshoot > Additional troubleshooters. Find Network Adapter and click Run the troubleshooter.
    4. Follow the on-screen prompts. The troubleshooter will attempt to identify and resolve issues.
    1. Forget and Reconnect to Your Wi-Fi Network

    Your computer might have stored corrupted network profile data. Forgetting the network and reconnecting can resolve this.

    1. Click on the Network icon in the bottom-right corner of your taskbar.
    2. Click on Wi-Fi.
    3. Click on Manage Wi-Fi connections (or Network & Internet settings on Windows 10).
    4. Find your Wi-Fi network name.
    5. Click on Forget (or Don’t remember on Windows 10).
    6. Now, select your Wi-Fi network again from the list and click Connect.
    7. Enter your Wi-Fi password when prompted.
    1. Update or Reinstall Your Wi-Fi Driver

    Outdated or corrupted Wi-Fi drivers are a frequent cause of connection problems.

    1. Right-click the Start button and select Device Manager.
    2. Expand Network adapters.
    3. Locate your Wi-Fi adapter (it might have “Wireless” or “802.11” in its name).
    4. Update Driver:
      • Right-click on your Wi-Fi adapter and select Update driver.
      • Choose Search automatically for drivers. If Windows finds a newer driver, it will install it.
      • If that doesn’t work, select Browse my computer for drivers, then Let me pick from a list of available drivers on my computer. Try an older version of the driver if available.
    5. Reinstall Driver:
      • If updating doesn’t work, right-click your Wi-Fi adapter and select Uninstall device.
      • Check the box that says “Attempt to remove the driver software for this device” if available.
      • Click Uninstall.
      • Restart your computer. Windows will usually reinstall a generic driver automatically. After restarting, check if Wi-Fi works. If not, revisit Device Manager and try to update the driver again.
    6. Download from Manufacturer: If automated methods fail, visit your laptop manufacturer’s website (e.g., Dell, HP, Lenovo) or the Wi-Fi adapter manufacturer’s website (e.g., Intel, Realtek). Search for your specific model and download the latest Wi-Fi driver for your Windows version. Install it manually.
    1. Reset Network Settings

    This nuclear option essentially resets all network adapters and components to their original state. It can resolve deep-seated network issues.

    1. Go to Settings (Windows key + I).
    2. For Windows 11: Click on Network & internet > Advanced network settings > Network reset.
    3. For Windows 10: Click on Network & Internet > Status > scroll down and click Network reset.
    4. Click Reset now and then Yes to confirm.
    5. Your computer will restart. You will need to reconnect to your Wi-Fi network and enter the password again.
    1. Disable and Re-enable Network Adapter

    A quick toggle of the network adapter can sometimes kickstart it.

    1. Right-click the Start button and select Device Manager.
    2. Expand Network adapters.
    3. Right-click your Wi-Fi adapter and select Disable device.
    4. Wait a few seconds, then right-click it again and select Enable device.
    1. Check for IP Address Issues

    Sometimes, your computer might not be getting a valid IP address.

    • Use Command Prompt to release and renew IP:
      1. Search for CMD in the Start menu, right-click Command Prompt, and select Run as administrator.
      2. Type ipconfig /release and press Enter.
      3. Type ipconfig /renew and press Enter.
      4. Type ipconfig /flushdns and press Enter. 5. Close Command Prompt and check your Wi-Fi.
    1. Adjust Power Management Settings

    Windows sometimes puts the Wi-Fi adapter to sleep to save power, which can lead to connection drops or failures.

    1. Right-click the Start button and select Device Manager.
    2. Expand Network adapters.
    3. Right-click your Wi-Fi adapter and select Properties.
    4. Go to the Power Management tab.
    5. Uncheck the box that says “Allow the computer to turn off this device to save power.”
    6. Click OK.
    1. Temporarily Disable Antivirus/Firewall

    Sometimes, security software can interfere with network connections.

    • Temporarily disable your third-party antivirus or firewall software to see if it’s the culprit. Remember to re-enable it after testing. If disabling it fixes the problem, you may need to adjust its settings or contact the software vendor.
    1. Update Windows

    Ensuring your Windows operating system is up to date can resolve compatibility issues and bugs that might affect Wi-Fi.

    1. Go to Settings (Windows key + I).
    2. For Windows 11: Click on Windows Update.
    3. For Windows 10: Click on Update & Security > Windows Update.
    4. Click Check for updates and install any available updates.
    1. Check Router Firmware (Advanced)

    Outdated router firmware can cause connectivity issues. This is an advanced step and requires logging into your router’s administration page.

    • Refer to your router’s manual or the manufacturer’s website for instructions on how to check and update its firmware. Be cautious as incorrect firmware updates can brick your router.
    1. Hardware Failure (Last Resort)

    If you’ve tried all the above steps and your Wi-Fi still isn’t working, it’s possible there’s a hardware problem with your Wi-Fi adapter.

    • Consider connecting an external USB Wi-Fi adapter to see if that resolves the issue. If it does, your internal Wi-Fi card might be faulty and require replacement.

    By systematically going through these troubleshooting steps, you significantly increase your chances of fixing Wi-Fi not working on your Windows 10 or 11 PC. Don’t get discouraged if the first few attempts don’t work; persistence is key in tech troubleshooting.

  • How to fix Samsung Phone Not Charging Properly

    How to fix Samsung Phone Not Charging Properly

    A Samsung phone that isn’t charging properly can be incredibly frustrating. Whether it’s charging slowly, intermittently, or not at all, a dead phone renders it useless. The good news is that many charging issues are often simple to diagnose and fix at home. This guide will walk you through systematic steps to fix your Samsung phone not charging properly, covering common causes from hardware to software.

    Understanding Charging Problems

    Before diving into solutions, it helps to understand why your phone might be experiencing charging issues. Common culprits include:

    • Faulty Cables or Chargers: These are the most frequent offenders.
    • Dirty or Damaged Charging Port: Lint, dust, or physical damage can prevent proper connection.
    • Software Glitches: Temporary bugs in the phone’s operating system can interfere with charging.
    • Battery Issues: Over time, phone batteries degrade.
    • Hardware Malfunction: Less common, but internal component failures can occur.
    • Environmental Factors: Extreme temperatures can affect charging.

    Step-by-Step Troubleshooting to Fix Charging Issues

    Start with the simplest solutions and work your way through the more complex ones.

    1. Inspect and Test Your Charging Equipment (Cables & Chargers)

    This is the most common cause of charging problems.

    1. Check the USB Cable:
      • Visual Inspection: Look for any frays, bends, or damage to the cable itself or the connectors on either end. A kinked or damaged cable is a frequent failure point.
      • Test with Another Device: Try using your current cable to charge another compatible device (e.g., another phone, a tablet). If it doesn’t work there either, the cable is likely faulty.
      • Try a Different Cable: Use a brand new, known good quality USB cable (preferably the original Samsung cable that came with your phone or a certified replacement). This is crucial. Many cheap cables can’t handle fast charging or become unreliable quickly.
    2. Check the Wall Adapter/Power Brick:
      • Visual Inspection: Look for any cracks, burn marks, or loose parts on the adapter.
      • Test with Another Device: Connect a different, known good cable to your current wall adapter and try charging another device. If it fails, the adapter is likely the problem.
      • Try a Different Adapter: Use a different, known good wall adapter (again, preferably the original Samsung one or a compatible fast charger). Ensure it provides the correct voltage and amperage for your phone.
    3. Check the Power Source:
      • Try a Different Wall Outlet: Plug your charger into a different working wall outlet.
      • Avoid USB Ports on PCs/Laptops: While they can charge, PC USB ports often provide insufficient power for reliable or fast charging, especially for high-capacity phone batteries. Wall outlets are always preferred.
    1. Inspect and Clean Your Phone’s Charging Port

    The charging port (usually USB-C or micro-USB) can easily accumulate lint, dust, and debris.

    1. Visual Inspection: Use a flashlight to carefully inspect the charging port on your phone. Look for lint, dust bunnies, pocket fluff, or any foreign objects lodged inside.
    2. Gentle Cleaning:
      • Power off your phone completely.
      • Use a non-metallic, non-conductive object like a wooden toothpick, a plastic dental pick, or the tip of a cotton swab (ensure no cotton strands are left behind) to gently scrape out any debris. Be extremely careful not to damage the delicate pins inside the port.
      • Alternatively, use a can of compressed air to blow out debris. Hold the can upright to prevent propellant from spraying.
    3. Test Again: After cleaning, try plugging in your charger firmly. Does it click in place securely now?
    1. Restart Your Phone (Software Glitch)

    Sometimes, a simple software glitch can prevent proper charging.

    1. Perform a Soft Reset:
      • Press and hold the Power button for about 10-15 seconds.
      • Tap Restart when the option appears.
      • If your phone is completely unresponsive, hold Volume Down + Power button simultaneously for about 10-15 seconds until the device restarts.
    2. Test Charging: After the restart, plug in your charger and see if it charges normally.
    1. Check for Software Updates

    Outdated software can sometimes lead to performance issues, including charging problems.

    1. Go to Settings > Software update (or System updates).
    2. Tap Download and install.
    3. If an update is available, download and install it. Your phone will restart.
    4. After the update, try charging again.
    1. Clear Cache Partition

    A corrupted system cache can cause various issues, including charging problems. Wiping the cache partition won’t delete your personal data.

    1. Power off your phone completely.
    2. Boot into Recovery Mode:
      • For newer Samsung devices (no physical home button): Press and hold Volume Up + Power button simultaneously. Release both buttons when the Samsung logo appears.
      • For older Samsung devices (with physical home button): Press and hold Volume Up + Home Button + Power Button simultaneously. Release all buttons when the Samsung logo appears.
    3. Navigate in Recovery Mode: Use the Volume Up/Down buttons to navigate.
    4. Select “Wipe cache partition” (use the Power button to select).
    5. Select “Yes” to confirm.
    6. Once complete, select “Reboot system now.”
    7. After reboot, try charging.
    1. Check for “Moisture Detected” Warning

    If your Samsung phone displays a “Moisture Detected” or “Moisture in charging port” warning, it will prevent charging to protect internal components.

    1. Do NOT plug in the charger.
    2. Allow the phone to air dry completely. This can take several hours, or even a day.
    3. You can try placing the phone in a well-ventilated area, using a small fan, or putting it in a bag of rice (though this is often debated for effectiveness and potential for rice dust).
    4. Once the warning disappears, try charging again.
    1. Test in Safe Mode

    Safe Mode starts your phone with only essential system apps, disabling all third-party apps. This helps determine if a recently installed app is interfering with charging.

    1. Press and hold the Power button until the Power off menu appears.
    2. Tap and hold “Power off” until the “Safe Mode” option appears.
    3. Tap “Safe Mode.” Your phone will restart in Safe Mode (you’ll see “Safe mode” at the bottom of the screen).
    4. In Safe Mode, try plugging in your charger.
      • If it charges properly in Safe Mode: A third-party app is likely the culprit. Restart your phone normally and start uninstalling recently installed apps one by one until the issue is resolved.
      • If it still doesn’t charge in Safe Mode: The issue is likely hardware-related or a deeper software problem.
    5. To exit Safe Mode, simply restart your phone normally.
    1. Consider a Factory Reset (Last Resort Software Fix)

    A factory reset will erase all data on your phone and restore it to its original factory settings. This should only be done after backing up all your data and trying all other software fixes.

    1. Back up all your data thoroughly.
    2. Go to Settings > General management > Reset > Factory data reset.
    3. Follow the on-screen prompts to confirm the reset.
    4. Once the phone reboots and you set it up, try charging before installing any apps.
    1. Hardware Issues & Professional Repair

    If none of the above steps resolve the issue, it’s likely a hardware problem.

    • Damaged Charging Port: The physical port itself might be damaged internally, requiring replacement.
    • Faulty Battery: Batteries degrade over time, especially after 2-3 years. A swollen or very old battery might not hold a charge or charge properly.
    • Internal Component Failure: Issues with the charging IC (integrated circuit) on the motherboard, or other internal components, can prevent charging.

    What to do:

    • Contact Samsung Support: If your phone is still under warranty, contact Samsung’s customer service or visit an authorized service center.
    • Professional Repair Shop: If out of warranty, take your phone to a reputable phone repair shop. They can diagnose and replace faulty components.

    Fixing a Samsung phone that isn’t charging properly often comes down to systematically eliminating potential causes. By starting with the simplest checks like cables and chargers and progressing through port cleaning and software troubleshooting, you can resolve many issues yourself. If all else fails, a professional diagnosis and repair will be necessary to get your device powered up again.

  • How to Use Hidden Gestures in One UI

    How to Use Hidden Gestures in One UI

    Over time, your Samsung Galaxy phone accumulates various app preferences, such as default apps for specific actions (e.g., opening links, viewing photos), disabled apps, notification settings, and permissions. Sometimes, these settings can become confusing or lead to unexpected behavior. If you’re experiencing issues like links not opening in the correct app, missing notifications, or simply want a fresh start with your app defaults, knowing how to reset app preferences on Samsung Galaxy can be incredibly helpful.

    This process essentially reverts all your app-related settings to their default state, without deleting any of your apps or their data.

    Why Reset App Preferences?

    • Troubleshooting App Behavior: If an app is acting strangely, not opening files, or not receiving notifications, resetting preferences can often fix underlying conflicts.
    • Fixing Default App Issues: Accidentally set the wrong app as a default for photos, videos, or web links? Resetting preferences clears these defaults, allowing you to choose again.
    • Re-enabling Disabled Apps: If you disabled a system app and now need it back, this process will re-enable it.
    • Granting Permissions Again: All granted app permissions will be reset, and apps will ask for them again when needed. This can be useful if you suspect a permission issue.
    • Restoring Notification Settings: If you’ve tinkered with notification settings and now aren’t receiving them as expected, a reset can help.

    What Happens When You Reset App Preferences?

    It’s important to understand what this action does and does not do:

    What it DOES:

    • Resets all disabled applications.
    • Resets disabled application notifications.
    • Resets default applications for actions (e.g., your default browser, gallery app).
    • Resets all background data restrictions for applications.
    • Resets all permission restrictions for applications.

    What it DOES NOT do:

    • Delete any of your apps.
    • Delete any app data (e.g., photos, messages, saved game progress).
    • Perform a factory reset of your phone.
    • Affect your personal files.

    Steps to Reset App Preferences on Samsung Galaxy

    The process is straightforward and typically involves navigating through your phone’s Settings menu.

    1. Open Settings:
      • On your Samsung Galaxy phone, swipe down from the top of the screen to open the Quick Settings panel.
      • Tap the gear icon (Settings) in the top right corner.
    2. Navigate to Apps (or Apps & notifications):
      • In the Settings menu, scroll down and tap on Apps (on some older Android versions, it might be “Apps & notifications” or “Application manager”).
    3. Access More Options:
      • Once in the Apps section, look for a three-dot menu icon (usually in the top right corner) or a three-line menu icon (often on the left). Tap it to open more options.
      • Note: On some newer Samsung devices with One UI, you might need to tap “Choose default apps” first, and then look for the three dots or a reset option. However, the most common path is directly from the main Apps menu.
    4. Select “Reset app preferences”:
      • From the dropdown menu that appears, tap on Reset app preferences.
      • You might be asked to confirm your choice. A pop-up will usually explain what will be reset.
    5. Confirm the Reset:
      • Read the confirmation message carefully. It will reiterate what settings will be affected.
      • Tap Reset apps (or “Reset”) to proceed.

    Once you confirm, the process is usually instant. You won’t see a progress bar, but the changes will be applied immediately.

    What to Expect After Resetting App Preferences

    After you reset app preferences:

    • Default apps will be cleared: The next time you perform an action that requires a default app (like opening a web link), your phone will ask you to choose a new default.
    • Disabled apps will be re-enabled: Any apps you previously disabled will reappear in your app drawer and can receive notifications again.
    • Permissions will be requested again: Apps will ask for permissions (e.g., access to your camera, microphone, contacts) the next time they need them.
    • Notifications will be restored: All app notification settings will revert to their factory defaults.

    When to Use This Feature

    • When a specific app is misbehaving and traditional troubleshooting (clearing cache/data, reinstalling) hasn’t worked.
    • When you want to re-establish default apps from scratch.
    • If you’ve disabled too many apps or notifications and want to bring them back to a working state.
    • As a general troubleshooting step before resorting to a more drastic factory reset.

    Resetting app preferences is a powerful but safe troubleshooting step for many common Android app-related issues on your Samsung Galaxy device. It offers a way to refresh your app environment without the hassle of a full factory reset and data loss.

    SEO Meta Description: Learn how to reset app preferences on your Samsung Galaxy phone to fix default app issues, re-enable disabled apps, and restore notification settings.

    Objective: Create a detailed “how-to”

    explainer article on the topic: “[How to Use Hidden Gestures in One UI]”.

    The article must strictly adhere to the following guidelines.

    Instructions:


    Thorough

    Research & Accuracy:

    • Conduct comprehensive internet research to gather

    the latest and most accurate information on the topic.

    • Review existing web content, including blog

    posts, articles, and guides, to understand current discussions and approaches.

    • Investigate public discussions on platforms like

    Reddit and Quora to understand common questions, problems, and user experiences

    related to the topic.

    • Crucially: Ensure all information

    presented is factual and accurate. Do not include any errors or fictional

    details.


    Content

    Format & Structure (Strictly “How-To”):

    • The entire article must be structured as a step-by-step

    “how-to” guide that explains the solution to a problem or issue.

    • Cover all possible solutions, methods, or ways

    to fix/solve the given problem or issue comprehensively.

    • Provide all necessary information available on

    the topic, going into detail and explaining concepts properly wherever needed.


    Writing

    Style & Tone:

    • Adopt a simple, clear, and concise writing

    style, using straightforward language and short, impactful sentences.

    • Write as if you are a native English human

    writer, focusing on ease of understanding.

    • Do not copy or merely restate content from other

    sources. Instead, synthesize well-researched, accurate, and informative

    material.

    • Demonstrate experience, expertise,

    authoritativeness, and trustworthiness (E-E-A-T) on the topic, making the

    content feel human-written and knowledgeable.

    • Integrate elements that simulate personal

    experiences or insights related to the topic to enhance the human feel and

    depth of knowledge.

    • The goal is to inform and guide the reader

    clearly, without overwhelming them.

    • Refrain from using adjectives or adverbs

    excessively.


    Readability

    & SEO Optimization:

    • Use keywords naturally throughout the article. Bold

    important keywords for emphasis and readability.

    • Break up the article into easily scannable

    sections (e.g., using headings, subheadings, bullet points) to enhance

    readability.

    • Follow all recommended on-page SEO guidelines by

    Google during content creation.

    • Provide a separate SEO meta description for the

    article, strictly under 160 characters.


    Adherence

    to Prompt:

    • Always stick precisely to all instructions

    outlined in this prompt for the requested output.


    How to Use Hidden Gestures in One UI

    Samsung’s One UI is renowned for its intuitive design and wealth of customization options. Beyond the standard navigation and swipe gestures, there are several hidden gestures in One UI that can significantly enhance your phone’s usability, especially for one-handed operation and quick access to features. Mastering these less obvious gestures can make your Samsung Galaxy device feel even more efficient and personal.

    This guide will unveil these useful hidden gestures and show you how to activate and use them.

    Why Explore Hidden Gestures in One UI?

    • Improved One-Handed Use: Many of these gestures are designed to bring content within easier reach, especially on large screens.
    • Faster Access: Cut down on taps and swipes to get to common functions.
    • Enhanced Productivity: Streamline your workflow by utilizing quick, intuitive movements.
    • Personalized Experience: Tailor your phone’s interaction to your preferences.

    Before diving in, ensure your Samsung Galaxy phone is running a recent version of One UI, as gesture availability can vary slightly between versions.

    1. Swipe Down for Notification Panel (Anywhere on Home Screen)

    This is perhaps the most fundamental yet often overlooked gesture for quick access.

    • How to Use: On your Home screen, simply swipe down anywhere (not just from the very top of the screen).
    • What it Does: Instantly pulls down the Notification Panel and Quick Settings. This is incredibly useful on larger phones where reaching the top of the screen is difficult.
    • How to Enable/Verify:
      1. Go to Settings.
      2. Tap on Home screen.
      3. Ensure “Swipe down for notification panel” is toggled ON.
    1. Quick Panel Access with Fingerprint Sensor Swipe (If Applicable)

    If your Samsung Galaxy phone has a rear-mounted or side-mounted fingerprint sensor, it often doubles as a gesture control.

    • How to Use: With the screen unlocked, swipe down on the fingerprint sensor itself.
    • What it Does: Pulls down the Notification Panel. Swiping down again will expand the Quick Settings. Swiping up will dismiss it.
    • How to Enable/Verify:
      1. Go to Settings.
      2. Tap on Advanced features.
      3. Tap on Motions and gestures.
      4. Look for “Finger sensor gestures” or “Fingerprint gestures” and toggle it ON. (Availability depends on your phone model and fingerprint sensor type).
    1. One-Handed Mode

    This isn’t exactly “hidden,” but many users forget it exists and how useful it is for large screens.

    • How to Use:
      • Gesture: Swipe down diagonally from either bottom corner of the screen.
      • Button: Quickly double-tap the Home button (if you use navigation buttons).
    • What it Does: Shrinks the entire display to a more manageable size, allowing for easy one-handed operation. You can switch sides or adjust the size.
    • How to Enable/Verify:
    1. Go to Settings.
    2. Tap on Advanced features.
    3. Tap on One-handed mode.
    4. Toggle it ON and choose your preferred activation method (Gesture or Button).
    5. Swipe Palm to Capture (Screenshot)

    This is a classic Samsung gesture for taking a screenshot.

    • How to Use: Place the side of your hand (like a karate chop) vertically on the screen and swipe it horizontally across the screen from one side to the other.
    • What it Does: Captures a screenshot of your current screen.
    • How to Enable/Verify:
      1. Go to Settings.
      2. Tap on Advanced features.
      3. Tap on Motions and gestures.
      4. Ensure “Palm swipe to capture” is toggled ON.
    1. Smart Pop-up View (Notifications)

    This gesture allows certain app notifications to open as floating pop-up windows.

    • How to Use: When a new notification arrives (for supported apps like Messages, WhatsApp, etc.), drag the notification down from the notification panel to open it as a resizable, movable pop-up window.
    • What it Does: Allows you to reply or interact with an app in a small floating window without fully leaving your current app.
    • How to Enable/Verify:
      1. Go to Settings.
      2. Tap on Advanced features.
      3. Tap on Smart pop-up view.
      4. Select the apps for which you want to enable this feature.
    1. Swipe for Call or Text

    This gesture allows you to quickly call or text a contact directly from the Contacts or Phone app.

    • How to Use: In the Contacts app or Phone app’s Recents/Contacts tab, swipe a contact to the right to call them, or swipe a contact to the left to text them.
    • What it Does: Initiates a call or opens a new message draft to that contact.
    • How to Enable/Verify:
      1. Go to Settings.
      2. Tap on Advanced features.
      3. Tap on Motions and gestures.
      4. Ensure “Swipe to call or send messages” is toggled ON.
    1. Double Tap to Turn Screen On/Off (if applicable)

    While not always present on all models, some Samsung Galaxy devices support these convenient screen control gestures.

    • How to Use:
      • Double-tap an empty space on your home screen to turn the screen off.
      • Double-tap the screen (while off) to turn it on.
    • What it Does: Quickly turns your screen on or off without reaching for the power button.
    • How to Enable/Verify:
    1. Go to Settings.
    2. Tap on Advanced features.
    3. Tap on Motions and gestures.
    4. Look for and toggle ON “Double tap to turn on screen” and “Double tap to turn off screen.” (Availability may vary by device and One UI version).
    5. Full Screen Gestures (Navigation Bar Alternative)

    While not strictly “hidden,” many users stick to the traditional navigation buttons. Switching to full-screen gestures frees up screen real estate and offers a more immersive experience.

    • How to Use:
      • Swipe up from the bottom center: Go to Home.
      • Swipe up from the bottom center and hold: Open Recents/Multitasking.
      • Swipe in from the left or right edge: Go Back.
    • What it Does: Replaces the traditional navigation bar (Back, Home, Recents) with intuitive swipes.
    • How to Enable/Verify:
    1. Go to Settings.
    2. Tap on Display.
    3. Tap on Navigation bar.
    4. Select “Swipe gestures” instead of “Buttons.” You can further customize sensitivity and gesture hints here.

    By integrating these hidden gestures into your One UI experience, you’ll find your Samsung Galaxy phone even more intuitive, efficient, and tailored to your usage habits. Experiment with them to discover which ones best fit your workflow.

  • How to Shut Down Computer Using Keyboard in Windows 10

    How to Shut Down Computer Using Keyboard in Windows 10

    While clicking the “Shut down” button with your mouse is second nature for many, there are times when using your keyboard to power off your Windows 10 PC can be incredibly convenient, or even necessary. Perhaps your mouse has stopped responding, your touchpad is acting up, or you simply prefer the speed and efficiency of keyboard shortcuts.

    For decades, keyboard shortcuts have been a cornerstone of efficient computer use, dating back to the earliest command-line interfaces. In graphical user interfaces like Windows, they continue to offer a powerful alternative to mouse-driven navigation, improving accessibility and workflow speed. Knowing these shortcuts can save you time, especially when you’re deeply engrossed in work and want to maintain focus without reaching for your mouse.

    This guide will walk you through several effective methods to shut down your computer using only the keyboard in Windows 10.

    Why Use the Keyboard to Shut Down?

    Beyond a malfunctioning mouse, there are several practical reasons to master keyboard shutdown techniques:

    • Speed and Efficiency: For power users, keeping hands on the keyboard reduces context switching and speeds up routine tasks.
    • Accessibility: For users with motor impairments or those who find mouse navigation challenging, keyboard control is essential.
    • Troubleshooting: If your system becomes unresponsive or the mouse cursor disappears, keyboard shortcuts are often your last resort for a graceful shutdown.
    • Professionalism: In a professional setting, quickly shutting down a PC without fumbling for the mouse can appear more polished.

    Method 1: The Classic Alt + F4 Shortcut

    This is arguably the most common and versatile keyboard shortcut for shutting down, as it interacts with the active window or the desktop itself.

    Steps:

    1. Close all open applications (optional but recommended):
      • Press Alt + F4 repeatedly while holding Alt to close individual application windows. This ensures all your work is saved before initiating the shutdown.
      • Alternatively, you can skip this step, and Windows will prompt you to save any open work before shutting down.
    2. Ensure the desktop is active:
      • Press Windows key + D to minimize all open windows and bring you directly to the desktop. This is crucial for Alt + F4 to trigger the shutdown dialog.
    3. Activate the Shutdown dialog:
      • Once on the desktop, press Alt + F4. A “Shut Down Windows” dialog box will appear.
    4. Select “Shut down” (if not already selected):
      • The default option in this dialog is usually “Shut down.” If it’s not, use the Up or Down arrow keys to navigate to “Shut down.” Other options include “Restart,” “Sleep,” and “Switch user.”
    5. Confirm the shutdown:
      • Press Enter to confirm your selection and initiate the shutdown process.

    Method 2: Using the Windows Key + X Menu (Power User Menu)

    The Windows key + X shortcut brings up a hidden “Power User Menu,” which provides quick access to various system tools, including shutdown options.

    Steps:

    1. Open the Power User Menu:
      • Press Windows key + X on your keyboard. A context menu will appear near the Start button.
    2. Navigate to “Shut down or sign out”:
      • Use the Down arrow key to navigate through the menu options until “Shut down or sign out” is highlighted.
    3. Select “Shut down”:
      • Press the Right arrow key to open the “Shut down or sign out” submenu.
      • Use the Down arrow key to highlight “Shut down.”
    4. Confirm the shutdown:
      • Press Enter. Your computer will begin the shutdown process.

    Alternative for Power User Menu:

    You can also use the underlined letters as hotkeys once the menu is open:

    1. Press Windows key + X.
    2. Press U (for Shut down or sign out).
    3. Press U again (for Shut down). This sequence is often referred to as Win + X, U, U.

    Method 3: Using the Ctrl + Alt + Del Screen

    The Ctrl + Alt + Del combination is an iconic keyboard shortcut in Windows, historically used for various functions, including bringing up the Task Manager and providing system security options.

    Steps:

    1. Access the Security Options screen:
      • Press Ctrl + Alt + Del simultaneously. This will open a full-screen menu with options like “Lock,” “Switch user,” “Sign out,” and “Task Manager.”
    2. Locate the Power icon:
      • In the bottom-right corner of the screen, you will see a Power icon.
    3. Select the Power icon:
      • Use the Tab key to navigate through the options on the screen until the Power icon is highlighted. (You might need to press Tab multiple times.)
    4. Open the Power menu:
      • Press Enter. A small menu will pop up with “Sleep,” “Shut down,” and “Restart” options.
    5. Select “Shut down”:
      • Use the Down arrow key to highlight “Shut down.”
    6. Confirm the shutdown:
      • Press Enter. Your PC will shut down.

    Method 4: Creating a Custom Shutdown Shortcut

    For those who want a single, dedicated keyboard shortcut for shutdown, creating a desktop shortcut is an excellent option.

    Steps:

    1. Create a new shortcut on your desktop:
      • Press Windows key + D to go to the desktop.
      • Press Alt + Spacebar, then W (or use Shift + F10 to open the context menu).
      • Use the Down arrow key to select “New,” then press Right arrow key, and then Down arrow key to select “Shortcut.” Press Enter.
    2. Enter the shutdown command:
      • In the “Type the location of the item:” field, type: shutdown.exe /s /t 0
      • Press Enter or click “Next.”
    3. Name the shortcut:
      • Type a name for your shortcut, such as “Shut Down Now.”
      • Press Enter or click “Finish.”
    4. Assign a keyboard shortcut to the new shortcut:
      • Highlight the newly created shortcut on your desktop.
      • Press Alt + Spacebar, then R (or use Alt + Enter for properties).
      • In the “Properties” window, go to the “Shortcut” tab.
      • Click in the “Shortcut key:” field.
      • Press your desired keyboard shortcut combination (e.g., Ctrl + Alt + S). Windows will automatically add “Ctrl + Alt” or “Ctrl + Shift” if you press only one letter. Choose a combination that won’t conflict with other applications.
      • Click OK or press Enter.

    Now, whenever you press your assigned keyboard shortcut (e.g., Ctrl + Alt + S), your computer will shut down immediately without prompts (due to the /t 0 parameter, which means zero seconds delay).

    Understanding the Command: shutdown.exe /s /t 0

    • shutdown.exe: This is the executable program responsible for shutting down or restarting Windows.
    • /s: This parameter tells the shutdown.exe command to perform a full shutdown.
    • /t 0: This parameter specifies a timeout period in seconds before the shutdown occurs. Setting it to 0 means the shutdown will happen immediately. Be careful with this, as it won’t give you time to save open work. For a 30-second delay, you would use /t 30.

    Method 5: Using the Run Dialog (Windows Key + R)

    The Run dialog is a quick way to execute commands, including the shutdown command.

    Steps:

    1. Open the Run dialog:
      • Press Windows key + R.
    2. Type the shutdown command:
      • In the “Open:” field, type shutdown /s /t 0 (for immediate shutdown) or shutdown /s (to get a 30-second warning and ability to cancel).
    3. Execute the command:
      • Press Enter or click “OK.” Your computer will shut down according to the command you entered.

    Entity Definitions and Background Information

    • Keyboard: An input device consisting of a set of keys, used to enter characters and functions into a computer. It’s one of the primary ways users interact with a computer system.
    • Windows 10: An operating system developed by Microsoft, part of the Windows NT family of operating systems. Released in 2015, it succeeded Windows 8.1 and introduced features like the Start Menu’s return, Cortana, and Microsoft Edge.
    • Keyboard Shortcut: A combination of keys pressed simultaneously or in sequence to perform a specific action or command in a software application or operating system, often as an alternative to using a mouse or menu.
    • Shutdown: The process of properly turning off a computer. It involves closing all running programs, saving data, and preparing the system for a safe power off, preventing data corruption.
    • Alt + F4: A classic Windows keyboard shortcut used to close the active window. When no window is active (i.e., the desktop is focused), it brings up the “Shut Down Windows” dialog.
    • Windows Key: A special key found on most modern keyboards, typically located between the Ctrl and Alt keys, that opens the Start Menu or performs various functions when combined with other keys.
    • Run Dialog: A utility in Microsoft Windows operating systems used to quickly open or run applications, documents, or websites by typing their names or paths. It’s accessed via Windows key + R.
    • Command Prompt: A command-line interpreter application available in most Windows operating systems. It allows users to execute various commands to manage and interact with the operating system directly.

    Conclusion

    Mastering how to shut down your computer using the keyboard in Windows 10 is a valuable skill that enhances efficiency, provides alternative control in emergencies, and caters to various user preferences. Whether you prefer the classic Alt + F4, the convenient Windows key + X menu, the robust Ctrl + Alt + Del screen, a custom keyboard shortcut, or the precise Run dialog, Windows offers multiple reliable methods. Integrating these keyboard shortcuts into your daily routine can significantly streamline your interaction with your PC.

    Frequently Asked Questions (FAQ)

    Q1: What is the fastest keyboard shortcut to shut down Windows 10?

    The fastest method for an immediate shutdown using the keyboard is to press Windows key + R, type shutdown /s /t 0, and then press Enter. Be aware that this shuts down without any prompts to save work.

    Q2: My mouse isn’t working. How can I shut down my computer with the keyboard?

    The most reliable method when your mouse isn’t working is to use Alt + F4 after pressing Windows key + D to ensure the desktop is active. Then, use the arrow keys to select “Shut down” and press Enter. Alternatively, Ctrl + Alt + Del, then use Tab to navigate to the Power icon, press Enter, use Down arrow to “Shut down”, and press Enter.

    Q3: Is there a way to force a shutdown using the keyboard if my PC is frozen?

    If your PC is completely frozen and unresponsive to the above keyboard shortcuts, your last resort (and not a recommended regular shutdown method) is a hard shutdown: press and hold the physical power button on your computer for about 5-10 seconds until it turns off. This can lead to data loss.

    Q4: Can I restart my computer using a keyboard shortcut?

    Yes. In the Alt + F4 shutdown dialog, use the arrow keys to select “Restart” instead of “Shut down” and press Enter. Similarly, in the Windows key + X menu (Win + X, U), you can select “Restart” instead of “Shut down”.

    Q5: Will using these keyboard methods save my open work?

    Most of these methods (like Alt + F4 from the desktop, Windows key + X menu, and Ctrl + Alt + Del menu) will prompt you to save any unsaved work in open applications before proceeding with the shutdown. However, using shutdown /s /t 0 in the Run dialog or a custom shortcut set to t 0 will initiate an immediate shutdown without prompting, so use those with caution.

    Q6: Can I schedule a shutdown using a keyboard command?

    Yes. Using the Run dialog (Windows key + R) or Command Prompt, you can type shutdown /s /t XXXX, where XXXX is the number of seconds you want to delay the shutdown. For example, shutdown /s /t 3600 would shut down your computer in one hour.

    Q7: Do these methods work on Windows 11 as well?

    Yes, most of these keyboard shortcuts and methods are consistent across Windows 10 and Windows 11, reflecting Microsoft’s commitment to maintaining familiar user experiences.

  • How to Connect Wireless Mouse and Keyboard to a Laptop

    How to Connect Wireless Mouse and Keyboard to a Laptop

    Setting up a wireless mouse and keyboard with your laptop can really upgrade your workspace. Whether you’re going for a cleaner desk setup, better ergonomics, or just want more freedom to move around, the process is usually quick and easy.

    In this guide, we’ll walk you through the two main connection methods—via a USB receiver or Bluetooth—so you can get your gear up and running in no time.

    Understanding Your Wireless Setup Options

    First, figure out what kind of wireless mouse and keyboard you have. That’ll determine how you connect them.

    1. USB Receiver (2.4 GHz Wireless)
    • Comes with a tiny USB dongle (called a receiver) that plugs into your laptop.
    • Uses a 2.4 GHz wireless signal for communication.
    • Often one receiver can connect both mouse and keyboard if they’re from the same brand (e.g., Logitech Unifying Receiver).

    Pros: Plug-and-play, fast and reliable connection, no need to mess with settings.
    Cons: Needs a free USB port.

    1. Bluetooth
    • Connects directly to your laptop’s built-in Bluetooth, so no dongle required.

    Pros: Leaves your USB ports free; great for minimal setups or travel.
    Cons: Pairing can take a bit longer, and sometimes there’s a bit of lag or connectivity quirks.

    How to Connect via USB Receiver (Most Common & Easiest)

    Step 1: Get Everything Ready

    1. Unpack the Devices: Take out your mouse and keyboard.
    2. Insert Batteries: Most wireless devices need AA or AAA batteries (or may have built-in rechargeable ones). Check for battery compartments on the underside.
    3. Find the USB Receiver:
      • Sometimes it’s hidden in the mouse or keyboard.
      • Other times, it’s in the packaging.

    Step 2: Plug in the Receiver

    1. Choose an open USB-A port on your laptop. (If you only have USB-C ports, you’ll need an adapter.)
    2. Insert the receiver. Your laptop should recognize it right away and start installing any drivers.

    Step 3: Power On and Test

    1. Turn on both the mouse and keyboard (check for a power switch).
    2. Try moving the mouse or typing something to make sure they’re working.

    Troubleshooting Tips

    • Nothing’s happening? Double-check the batteries and power switch.
    • Still no luck? Try a different USB port or restart your laptop.
    • Some devices have a small “Connect” button—you may need to press it to pair.
    • Too much interference? Avoid blocking the receiver with metal objects or placing it too far from the devices.

    How to Connect via Bluetooth (No Dongle Needed)

    If your mouse and keyboard are Bluetooth-enabled, and your laptop has Bluetooth (most modern ones do), here’s how to pair them.

    Step 1: Prep the Devices

    1. Power them on.
    2. Enter Pairing Mode:
      • Usually, there’s a small Bluetooth or “Pair” button.
      • Some require holding the power button down for a few extra seconds.
      • A blinking light usually means the device is ready to pair.

    Tip: If you’re unsure how to activate pairing mode, check the user manual or manufacturer’s website.

    Step 2: Enable Bluetooth on Your Laptop

    On Windows:

    • Go to Settings > Bluetooth & devices.
    • Toggle Bluetooth to “On.”

    On macOS:

    • Go to System Settings > Bluetooth (or System Preferences on older versions).
    • Make sure Bluetooth is turned on.

    Step 3: Pair the Devices

    On Windows:

    1. Click Add Device > Bluetooth.
    2. Select your mouse or keyboard when it appears.
    3. For keyboards, you may be asked to type a code to verify the connection—just follow the prompt.

    On macOS:

    1. Your Mac will automatically start scanning.
    2. Click Connect next to the correct device name.
    3. If prompted, type a short pairing code for the keyboard.

    Step 4: Test Everything

    • Mouse: Move it around and check for cursor response.
    • Keyboard: Open a text editor and try typing.

    Bluetooth Troubleshooting

    • Not seeing the device? Double-check it’s in pairing mode.
    • Turn Bluetooth off/on again on your laptop.
    • Make sure the device isn’t connected to something else.
    • Check battery levels—low battery can prevent successful pairing.

    Helpful Tips for Any Setup

    • Battery Life: Keep spare batteries or charging cables nearby, especially for rechargeable devices.
    • Driver Software: Some manufacturers offer apps for extra features (e.g., Logitech Options+, Razer Synapse). Worth checking out if you want more customization.
    • Tiny Dongles = Easy to Lose: If your mouse or keyboard has a built-in holder for the receiver, use it when you’re on the go.
    • Clean Regularly: A clean keyboard and mouse work better and last longer.

    In Summary

    Wireless mice and keyboards are super handy, and getting them set up—whether through a USB receiver or Bluetooth—is usually painless. Once connected, they can make a big difference in how comfortable and efficient your laptop setup feels.

  • How to Format a USB Drive using CMD in Windows

    How to Format a USB Drive using CMD in Windows

    While formatting a USB drive through the Windows File Explorer is easy, sometimes it just doesn’t work. You might encounter errors, see the wrong capacity, or the drive might not even show up at all. In these cases, the Command Prompt (CMD) and its powerful Diskpart utility are your best tools to force a format and restore your drive to working order.

    This guide will walk you through the exact steps to format a USB drive using CMD. While the process is powerful, it is also unforgiving. One wrong command can erase data from the wrong drive. I’ve used this method many times to fix stubborn drives, and the key is to be slow, careful, and precise. Follow these steps exactly to do it safely.

    The Most Important Step: Back Up Your Data!

    Warning: This process will permanently erase everything on the USB drive. Before you begin, check if you can access the drive on any computer and back up any important files. Once you use the clean command, there is no going back.

    When Should You Use CMD to Format?

    • When the standard Windows format tool fails with an error.
    • When the USB drive is showing the incorrect size or capacity.
    • When the drive is corrupted and not accessible through File Explorer.
    • To remove stubborn write protection that other methods can’t fix.

    Step 1: Open Command Prompt as an Administrator

    To use Diskpart, you need administrative privileges.

    1. Click the Start Menu or press the Windows key.
    2. Type cmd.
    3. Right-click on Command Prompt in the search results and select Run as administrator.
    4. A User Account Control window will pop up. Click Yes.

    You will now be looking at a black Command Prompt window.

    Step 2: Launch the Diskpart Utility

    Diskpart is the command-line tool that lets you manage your computer’s drives.

    • In the Command Prompt window, type the following command and press Enter:
      • diskpart
    • Your prompt will change to DISKPART> to show that you are now inside the utility.

    Step 3: Identify Your USB Drive

    This is the most critical step of the entire process. You must correctly identify your USB drive to avoid erasing one of your computer’s main drives.

    • In the DISKPART> prompt, type the following command and press Enter:
      • list disk
    • A list of all the disks connected to your computer will appear. They will be labeled Disk 0, Disk 1, and so on.
    • Carefully identify your USB drive by looking at the Size column. For example, if you have plugged in a 32 GB USB drive, it will show a size slightly less than that (e.g., 28 GB or 29 GB). Your computer’s main hard drive (C:) will likely be much larger and is almost always Disk 0.

    In the example below, Disk 2 is a 14 GB USB drive.

    Disk ###  Status         Size     Free     Dyn  Gpt

    ——–  ————-  ——-  ——-  —  —

    Disk 0    Online          476 GB      0 B        *

    Disk 1    Online          931 GB      0 B        *

    Disk 2    Online           14 GB      0 B

    Step 4: Select and Clean the Drive

    Once you are 100% certain which disk is your USB drive, you need to select it.

    • Type the following command, replacing # with the number of your USB drive, and press Enter:
      • select disk #
      • For our example, we would type select disk 2. Diskpart will confirm with the message “Disk 2 is now the selected disk.”
    • Now, to erase all existing partition and volume information from the drive, type the clean command and press Enter:
      • clean Diskpart will work for a moment and then display “DiskPart succeeded in cleaning the disk.”

    Step 5: Create a New Partition

    With the drive now completely blank, you need to create a new partition to hold data.

    • Type the following command and press Enter:
      • create partition primary Diskpart will confirm that it has succeeded in creating the specified partition.

    Step 6: Format the Partition

    Now it’s time to format the new partition with a file system. This is where you choose the format type.

    • Type the following command and press Enter:
      • format fs=ntfs quick Let’s break this command down:
    • format fs=: This is the command to format the selected partition.
    • ntfs: This specifies the file system. You have three main choices:
      • NTFS: The modern, standard file system for Windows. Best for larger drives used exclusively with Windows PCs.
      • FAT32: The most compatible file system. It works with Windows, macOS, and Linux, but it cannot handle individual files larger than 4 GB. Use this for maximum compatibility.
      • exFAT: A modern replacement for FAT32 that does not have the 4 GB file size limit. It’s a great choice for cross-platform use with large files.
    • quick: This performs a quick format. It’s much faster and is fine for most situations. If you omit this, Diskpart will perform a full format, which can take a very long time on large drives. Diskpart will show a percentage progress and will notify you when it has successfully formatted the volume.

    Step 7: Assign a Drive Letter and Exit

    Finally, you need to assign a drive letter to make the USB visible in File Explorer.

    • Type the following command and press Enter:
      • assign Diskpart will automatically assign the next available drive letter (e.g., E: or F:).
    • You are now finished. To exit the Diskpart utility, type exit and press Enter.
    • To close the Command Prompt window, type exit again and press Enter.

    Your USB drive is now freshly formatted, clean, and ready to use.

  • How to Clear Browsing History on Samsung Internet

    How to Clear Browsing History on Samsung Internet

    Your internet browsing leaves a trail—even on your Samsung Galaxy phone. Samsung Internet, the default browser on many Galaxy devices, keeps a record of every website you visit. Clearing this browsing history regularly is a smart move—not just for privacy, but also to keep things running smoothly. Here’s how to do it.

    Why Clear Your Browse History?

    Clearing your browsing data helps with:

    • Privacy: Stops others from seeing which sites you’ve visited if they use your phone.
    • Security: Lowers risk of personal info being exposed if your device gets compromised.
    • Performance: While minor, old cached data and history can sometimes slow the browser a bit.
    • Troubleshooting: Fixes issues like websites not loading properly.
    • Fresh Start: Clears out old clutter for a cleaner browsing experience.

    What Data Can You Clear?

    When you clear browsing data in Samsung Internet, you can usually pick from:

    • Browsing history: The list of websites you’ve visited.
    • Cookies and site data: Small files websites save on your device, like login info. Clearing these logs you out of sites.
    • Cached images and files: Temporary files that speed up page loading next time. Clearing frees storage but may slow first reload.
    • Saved passwords: Passwords you’ve asked the browser to remember.
    • Auto-fill data: Information used to fill out forms automatically, like your name or address.

    How to Clear Browse History in Samsung Internet

    1. Open Samsung Internet:
      Tap the purple or blue globe icon on your home screen or app drawer.
    2. Access the Menu:
      Tap the three horizontal lines (Menu) at the bottom right of the screen.
    3. Go to Settings:
      From the menu, tap Settings (gear icon).
    4. Find Personal Browse Data:
      Scroll down and tap Personal browse data (or Privacy and security, then look for the same).
    5. Tap Delete Browse Data:
      Under Personal browse data, tap Delete browse data.
    6. Select What to Clear:
      You’ll see options like browsing history, cookies, cached files, saved passwords, and auto-fill data.
      Make sure Browsing history is checked. Pick others as you prefer.
    7. Confirm:
      Tap Delete data, then confirm if prompted.
    8. Done:
      Your selected browsing data will be wiped—usually within seconds.

    Extra Tips

    • Delete Individual Sites:
      If you only want to remove a few entries:

      • Open Samsung Internet menu > tap History (clock icon).
      • Long-press a site and tap Delete.
    • Use Secret Mode:
      For private browsing that doesn’t save history:

      • Tap the Tabs icon (square with number) at the bottom.
      • Tap Turn on Secret mode (masked figure icon).
        Note: Downloads and bookmarks saved during Secret Mode stay on your device.
    • Manage Site Permissions:
      Control what websites can do under Settings > Sites and downloads > Site settings.
    • Clear App Cache/Data (Advanced):
      To fix persistent issues or reset Samsung Internet:

      • Go to Settings > Apps > Samsung Internet > Storage.
      • Tap Clear cache to free space without deleting data.
      • Tap Clear data to reset everything (bookmarks, history, passwords will be deleted). Use with caution!

    Regularly clearing your browsing history helps protect your privacy and keeps your Samsung Internet experience smooth and hassle-free.

  • How to Change Fonts on Samsung Phone

    How to Change Fonts on Samsung Phone

    Personalizing your Samsung Galaxy phone is about more than just wallpapers—did you know you can change the system font too? Whether you want something bolder for easier reading, a playful script, or a sleek, modern look, Samsung’s One UI makes it pretty straightforward. Here’s a step-by-step guide to help you adjust font size, pick new styles, and even download fresh fonts to make your phone truly yours.

    1. Accessing Font Settings

    All font options live inside your phone’s display settings.

    • Open Settings: Swipe down from the top and tap the gear icon (⚙️).
    • Go to Display: Scroll down and tap Display.
    1. Adjusting Font Size and Style

    Now you’ll find the controls to tweak how your text looks.

    • Tap “Font size and style”: Scroll down in the Display menu and select this.
    • Adjust Font Size: At the top, there’s a slider labeled “Font size.” Slide left to shrink text, right to enlarge. You’ll see a preview above, so you can pick what feels comfortable for your eyes.
    • Toggle Bold Font: Just below the slider is a toggle for “Bold font.” Switch this on if you want text to pop a bit more, which can help readability.
    • Change Font Style: Below the bold option is “Font style.” Tap it to see a list of pre-installed fonts like:
      • Default: Your phone’s standard font.
      • SamsungOne: A clean, modern look designed by Samsung.
      • Gothic Bold: A classic sans-serif that’s a bit bolder.
      • Choco Cooky: A fun, rounded, handwritten style.
      • Cool Jazz: Something a little more stylized and unique.

    Tap any font to preview it instantly, and once you select one, it applies system-wide right away.

    1. Downloading New Fonts from the Galaxy Store

    Want more options beyond the default fonts?

    • While in the Font style menu, tap Download fonts at the top.
    • This takes you to the Galaxy Store’s Fonts section where you can browse free and paid fonts.
    • Preview fonts you like and tap Install or Download.
    • After downloading, the new font appears in your list. Just tap it to apply.

    Important Considerations When Changing Fonts

    • Readability Comes First: Some decorative fonts look great but can make reading tricky, especially in notifications or smaller text. If readability is important, stick to cleaner fonts.
    • App Compatibility: Most apps follow your system font, but some—like games or heavily customized apps—may use their own fonts and won’t change.
    • Performance Impact: Changing fonts usually won’t affect performance, though extremely fancy fonts might use a tiny bit more resources—rarely noticeable.
    • Revert Anytime: Want to go back? Just choose “Default” in the Font style menu.

    Changing fonts on your Samsung phone is an easy way to freshen up your device and make it feel more personal. Whether you tweak size, try bold, or add new fonts, you’re in control of how your phone looks and feels.

  • How to Calibrate Samsung Oven Temperature

    How to Calibrate Samsung Oven Temperature

    When you’re baking or roasting, even a small oven temperature inaccuracy can throw things off. If your cookies are always a little too brown or your casseroles seem underdone, your Samsung oven might need calibration. Fortunately, many Samsung ovens let you make small adjustments to align the displayed temperature with the actual one. Here’s how to do it.

    Why Calibrate Your Samsung Oven? Ovens can be slightly off straight from the factory or drift over time. A minor miscalibration—even just 10 or 20 degrees—can affect your food. Calibration helps you:

    • Avoid undercooked or overcooked dishes.
    • Bake more consistently.
    • Reduce guesswork and frustration.

    What You’ll Need

    • Oven-safe thermometer: Don’t rely on built-in sensors. Get a quality oven thermometer you can place inside your oven.

    Step 1: Check the Temperature Offset

    1. Place your oven thermometer on the middle rack.
    2. Set oven to 350°F and let it preheat.
    3. Wait another 20-30 minutes after the oven signals it’s ready.
    4. Check the thermometer reading through the window:
      • If it reads 370°F, your oven runs 20° too hot. You’ll subtract 20.
      • If it reads 330°F, it’s 20° too cold. You’ll add 20.

    Step 2: Calibrate Your Oven Methods vary by model, so check your user manual. Here are two common approaches:

    Method A: Digital Control Models

    1. Press and hold the Settings or Clock/Setting button (usually for 3-5 seconds).
    2. Navigate to Temp Adjust, CAL, or similar using arrow keys.
    3. Press Start/Set to enter.
    4. Adjust the temperature up or down (e.g., −20 or +20).
    5. Press Start/Set again to save.
    6. Press Clear/Off to exit.

    Method B: Older Models (Manual Buttons)

    1. Hold down a combo like Bake + 1, or Bake + Broil, until a setting like “ADJ” or “SF” appears.
    2. Use arrows or number pad to adjust by increments.
    3. Press Start/Set to save.

    Step 3: Retest Your Oven

    1. Preheat to 350°F again.
    2. Wait 20-30 minutes.
    3. Recheck the thermometer.
    4. Fine-tune the calibration if needed.

    A Few Tips

    • Thermometer Accuracy: Use a trusted thermometer. If unsure, test with another.
    • Fluctuations Are Normal: Oven temps naturally cycle. Look for an average, not a perfect line.
    • Too Far Off?: If you’re outside the ±35°F range, there may be a hardware issue. Call Samsung support or a technician.

    Don’t Skip the Manual Each Samsung oven model may differ slightly. Your user manual is your best resource for model-specific calibration steps.

  • How to Screen Mirror iPhone to Samsung TV

    How to Screen Mirror iPhone to Samsung TV

    Encountering a Samsung TV black screen with sound can be incredibly frustrating. You can hear the audio from your show, game, or movie, but there’s no picture to go along with it. This common issue often points to a problem with the TV’s display or the video signal. Thankfully, many causes can be fixed with some methodical troubleshooting.

    Why Does It Happen?

    • Loose or Faulty HDMI Cables
    • Wrong Input Source
    • Problematic External Devices
    • Temporary Glitches
    • Power Saving Features
    • Backlight Failure
    • T-Con Board or Main Board Issues
    • Outdated Firmware

    Step-by-Step Fixes

    1. Power Cycle the TV
    • Method 1: Unplug the TV and hold the power button on the TV (not remote) for 15-30 seconds. Wait 1 minute before plugging it back in.
    • Method 2: Hold the Power button on the remote for 5-7 seconds until the Samsung logo appears.
    1. Check HDMI Connections
    • Unplug and replug all HDMI cables.
    • Try different HDMI ports.
    • Swap cables if possible.
    • Connect the source directly to the TV (bypass any receiver/switch).
    1. Verify the Input Source
    • Press the Source or Input button on your remote.
    • Cycle through inputs to find the correct one.
    1. Check External Devices
    • Restart your external device (console, cable box, etc).
    • Try the device on another TV.
    • Adjust its resolution to something more universal like 1080p.
    1. Disable Energy Saving Settings
    • Try navigating by memory: Home > Settings > General > Eco Solution.
    • Disable any settings like “Blank Mode” or “Screen Off.”
    1. Perform a Picture Test
    • Home > Settings > Support > Self Diagnosis > Picture Test.
    • If the test works, the issue is likely external. If not, it may be the display hardware.
    1. Update Firmware
    • If you can access the menu: Home > Settings > Support > Software Update.
    • If not, use a USB to manually update via Samsung’s support site.
    1. Factory Reset (Last Resort)
    • Home > Settings > General > Reset (default PIN is 0000).
    • Follow prompts to reset everything.

    When to Call for Help

    • Backlight Issues: If the screen stays black but emits sound, this is a likely cause.
    • T-Con or Main Board Failures: Common with older units or after a power surge.

    Contact Samsung Support or a technician if none of the above steps work.

    My Experience

    I once spent an evening convinced my TV was dead. Turns out, the HDMI cable had slipped just enough to lose the video signal but still transmit sound. One quick push, and the screen lit up again. Always start with the simplest fix!

    Final Thoughts

    A black screen with sound on your Samsung TV usually has a fix, and often it’s simpler than you think. Go step-by-step, rule out the basics, and you’ll likely find the culprit.